Manage Item
Add Item
To start using the software we need to add new item. Below are the steps to add new item manually from admin panel.
1. After logging in to the Galla app, click the ‘items’ option. This will appear on the left-hand side.

2. The page shown below will appear.

3. On the same page, you will find the ‘Add Item’ option, Click on it.

4. The page shown below will appear. Fill in the details here and click on Next.

5. Fill in the ‘item info’ details on the page shown below. The field label highlighted in RED is mandatory.

6. Fill in the ‘pricing’ details on the page shown below. With the “Add New Price” button , you can add multiple prices for the same product.

7. Now fill in the location wise inventory details on the next page.

8. Once item info, pricing, and inventory details are filled in. Click on “Save”.

Hurray! Your Item has been successfully added!
Edit Item
Editing Item enables you to make changes in the item data, namely item name, barcode, category, SKU, etc. To edit, follow the following steps:
1. Select the product you wish to edit by clicking the ‘pen icon’.

2. The page shown below will appear. Edit the ‘item info’ details here.

3. Edit the ‘pricing’ details on the page shown below.

4. Edit Item “Inventory” will help you to make the item available or not available. We cannot edit the inventory count from below screen ,that is possible from stock adjustment.

5. Click on “Save”.

You have successfully edited the item.
Import Item
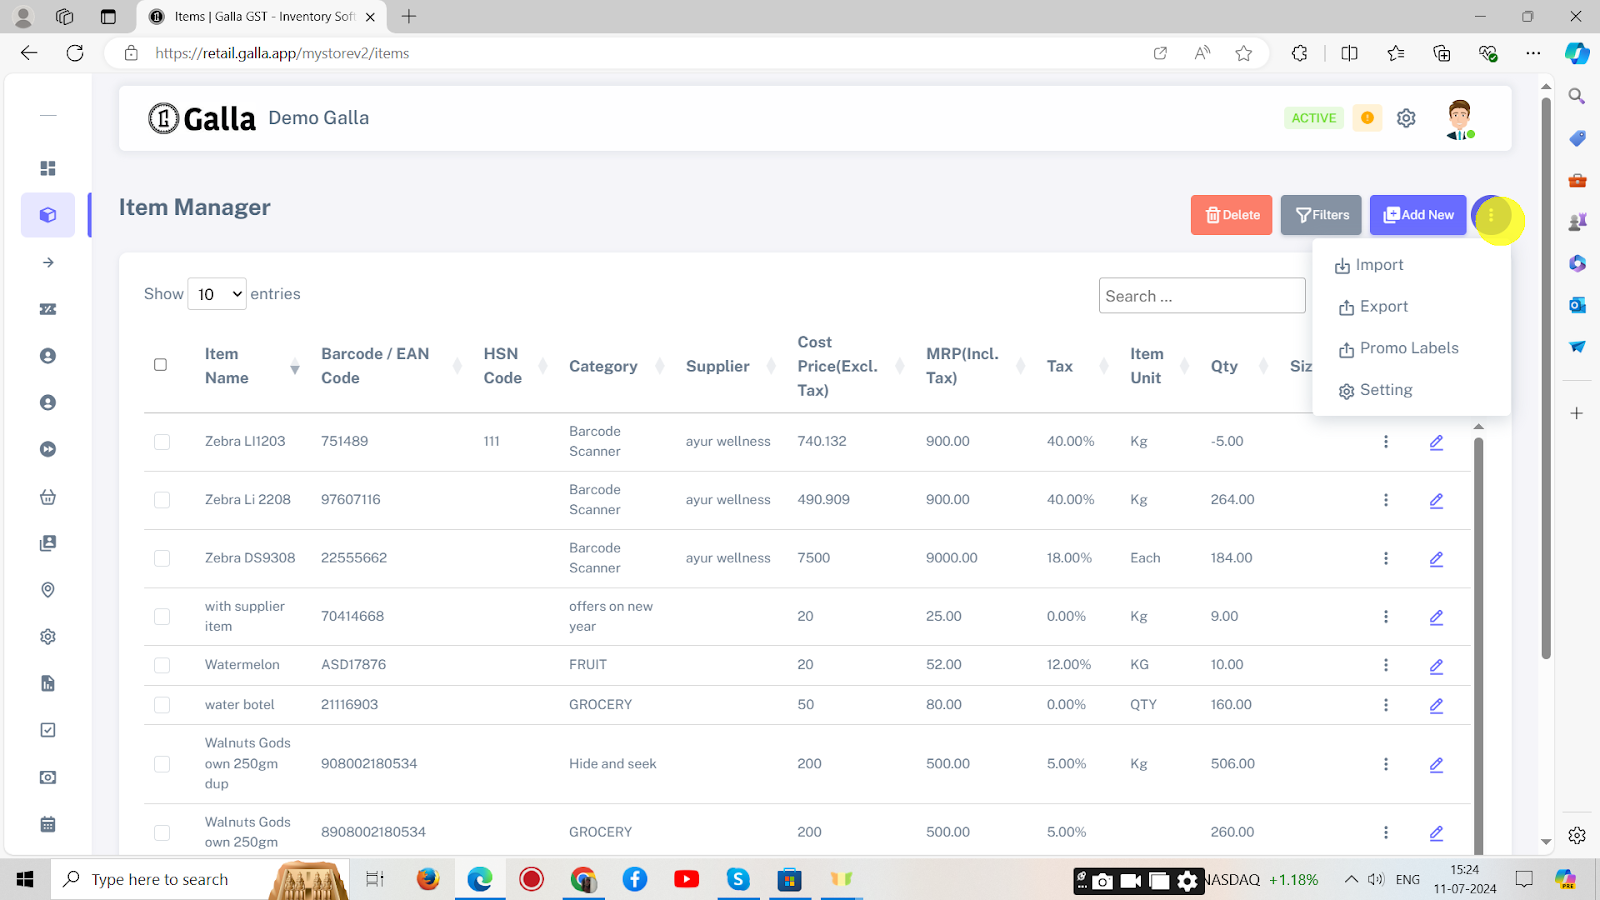
1. To import items, click on 3 dots on the right-hand side and a drop-down menu will appear, as shown below.
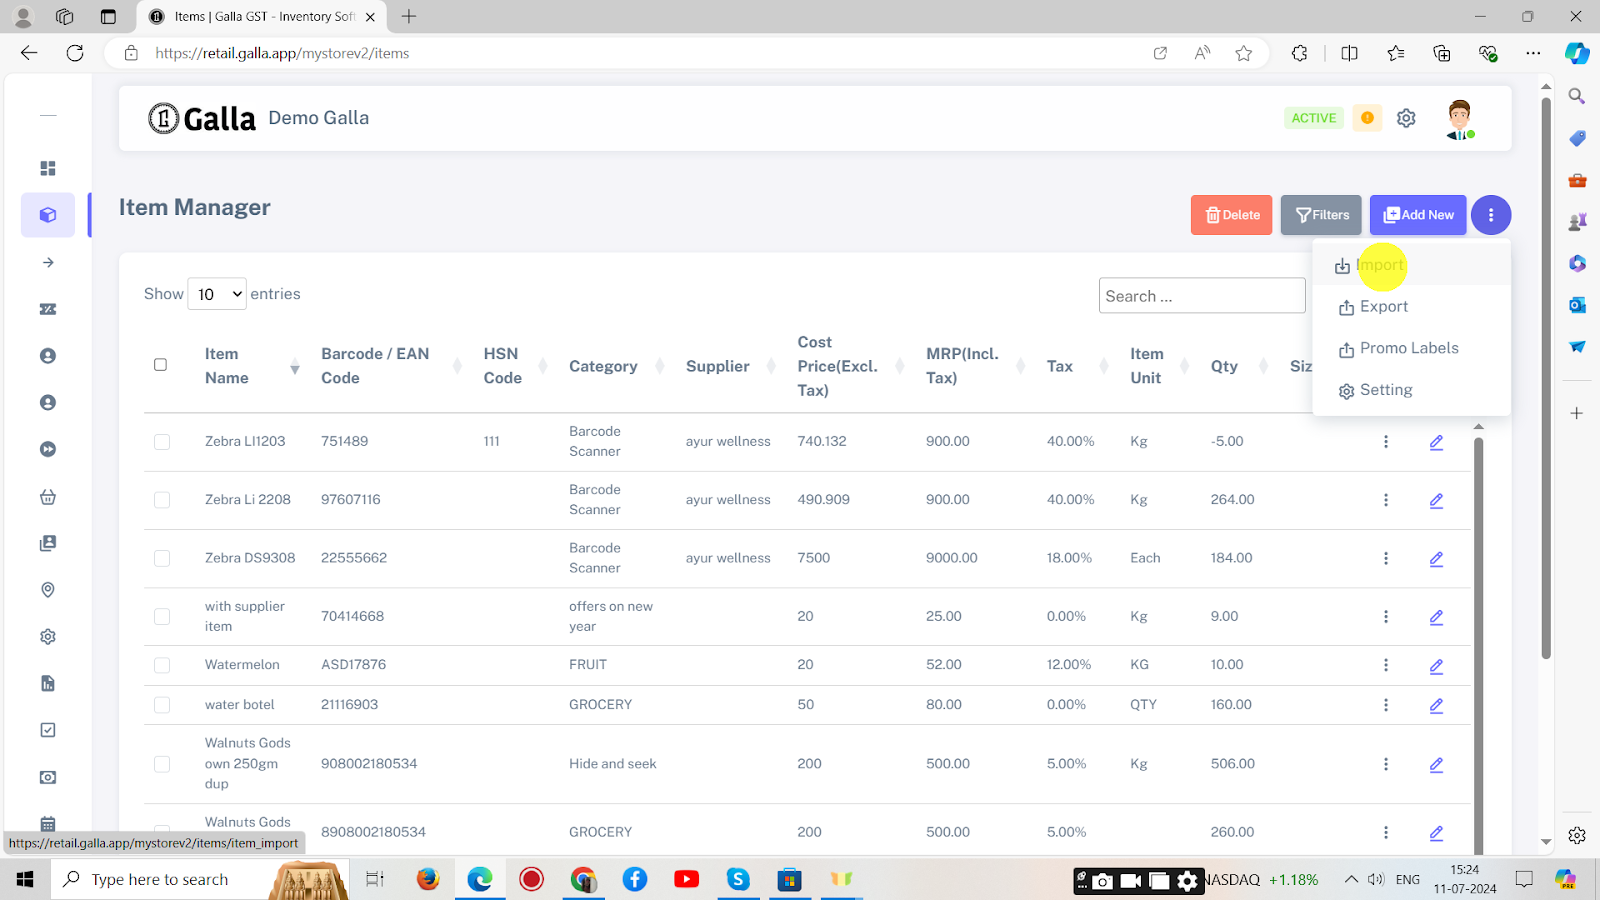
2. From the drop-down menu, select import.
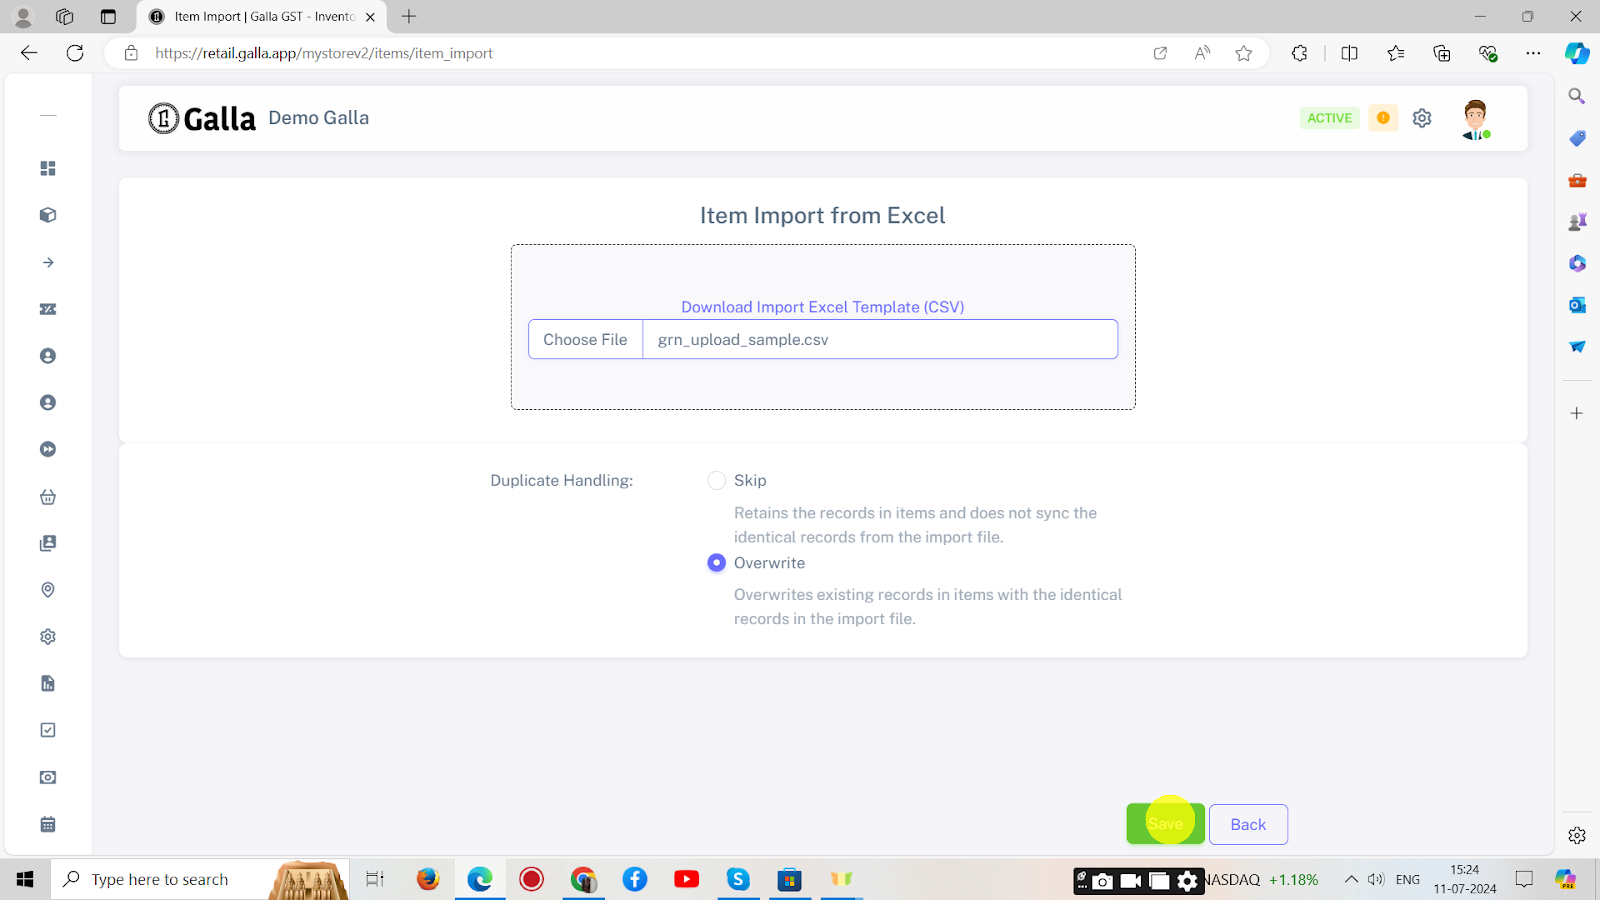
3. The page shown below will appear. Choose a CSV file, and click on Save.
Export Item
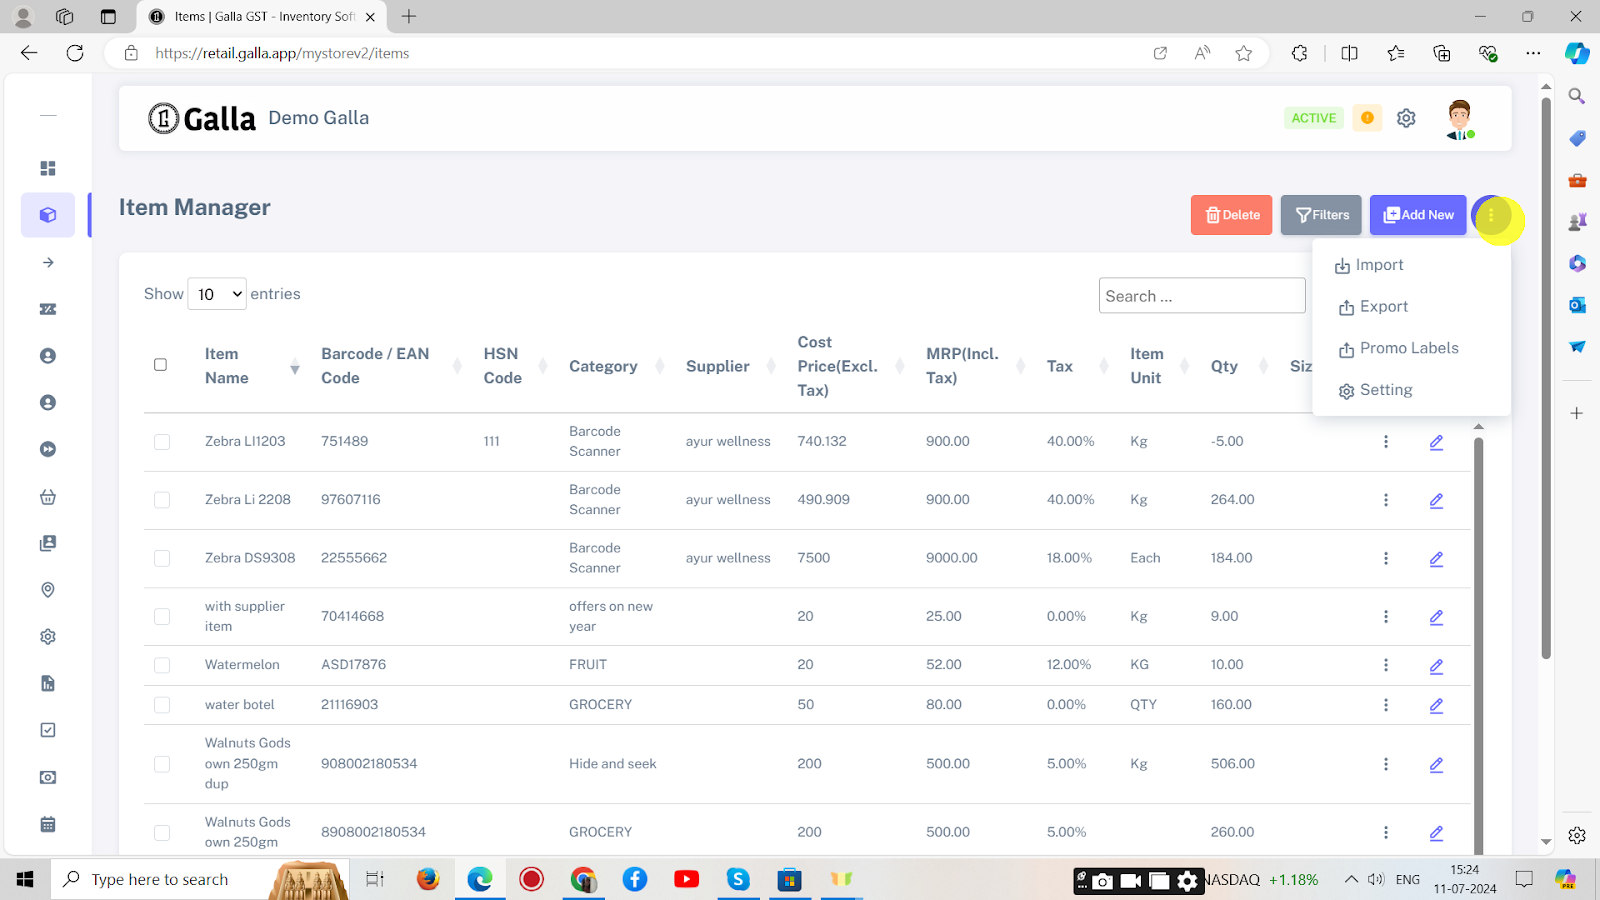
1. To export items, click on 3 dots on the right-hand side and a drop-down menu will appear, as shown below.
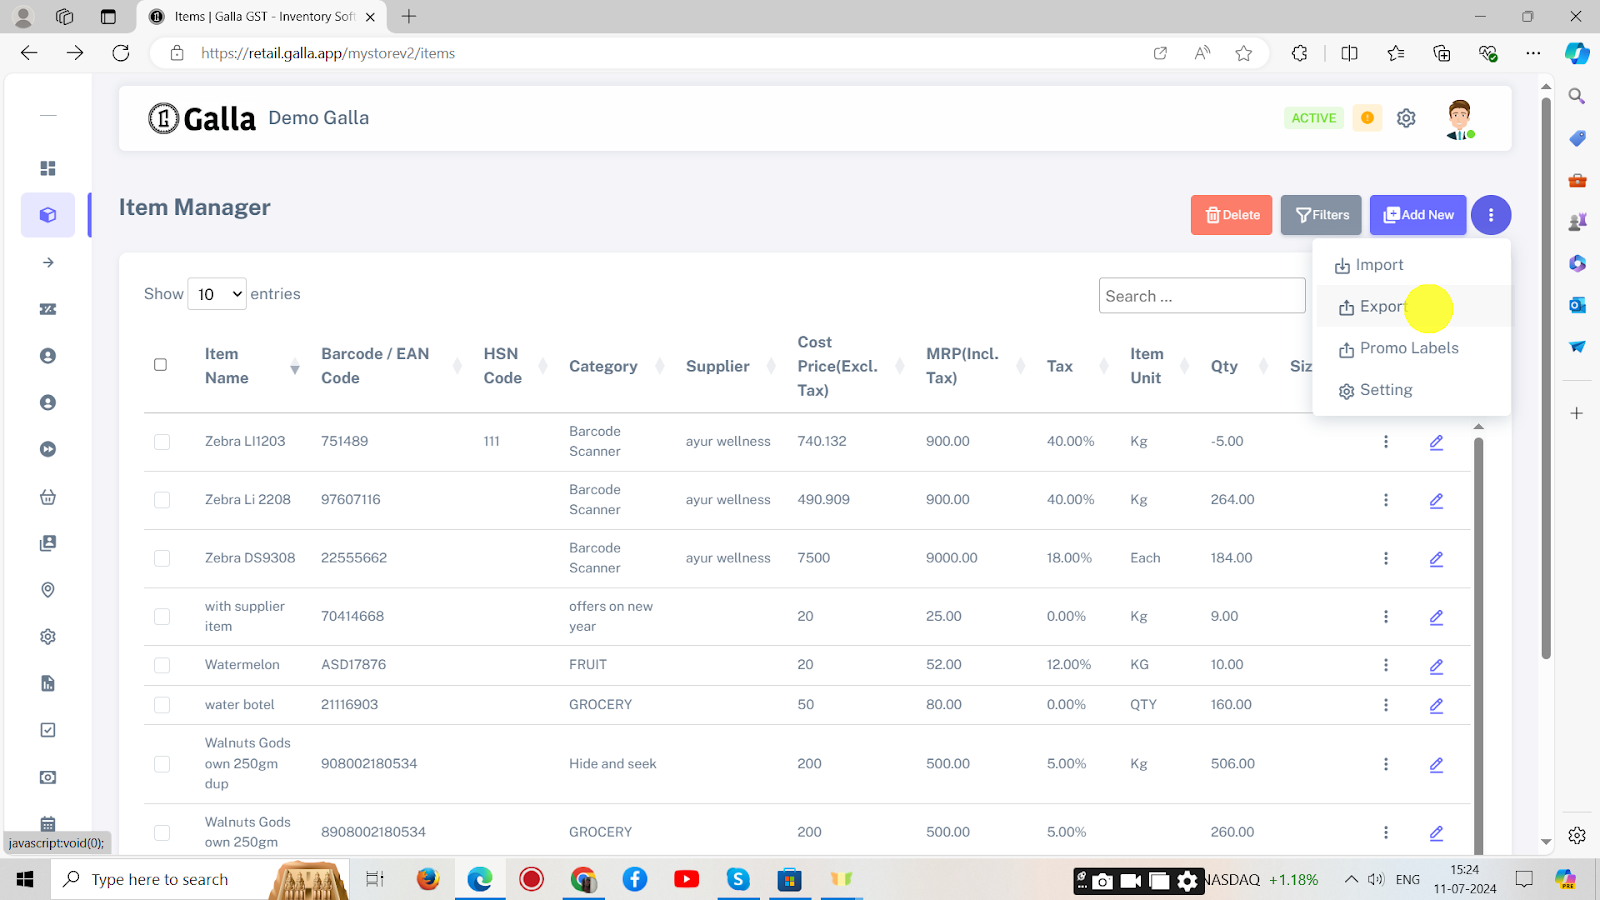
2. From the drop-down menu, select export.
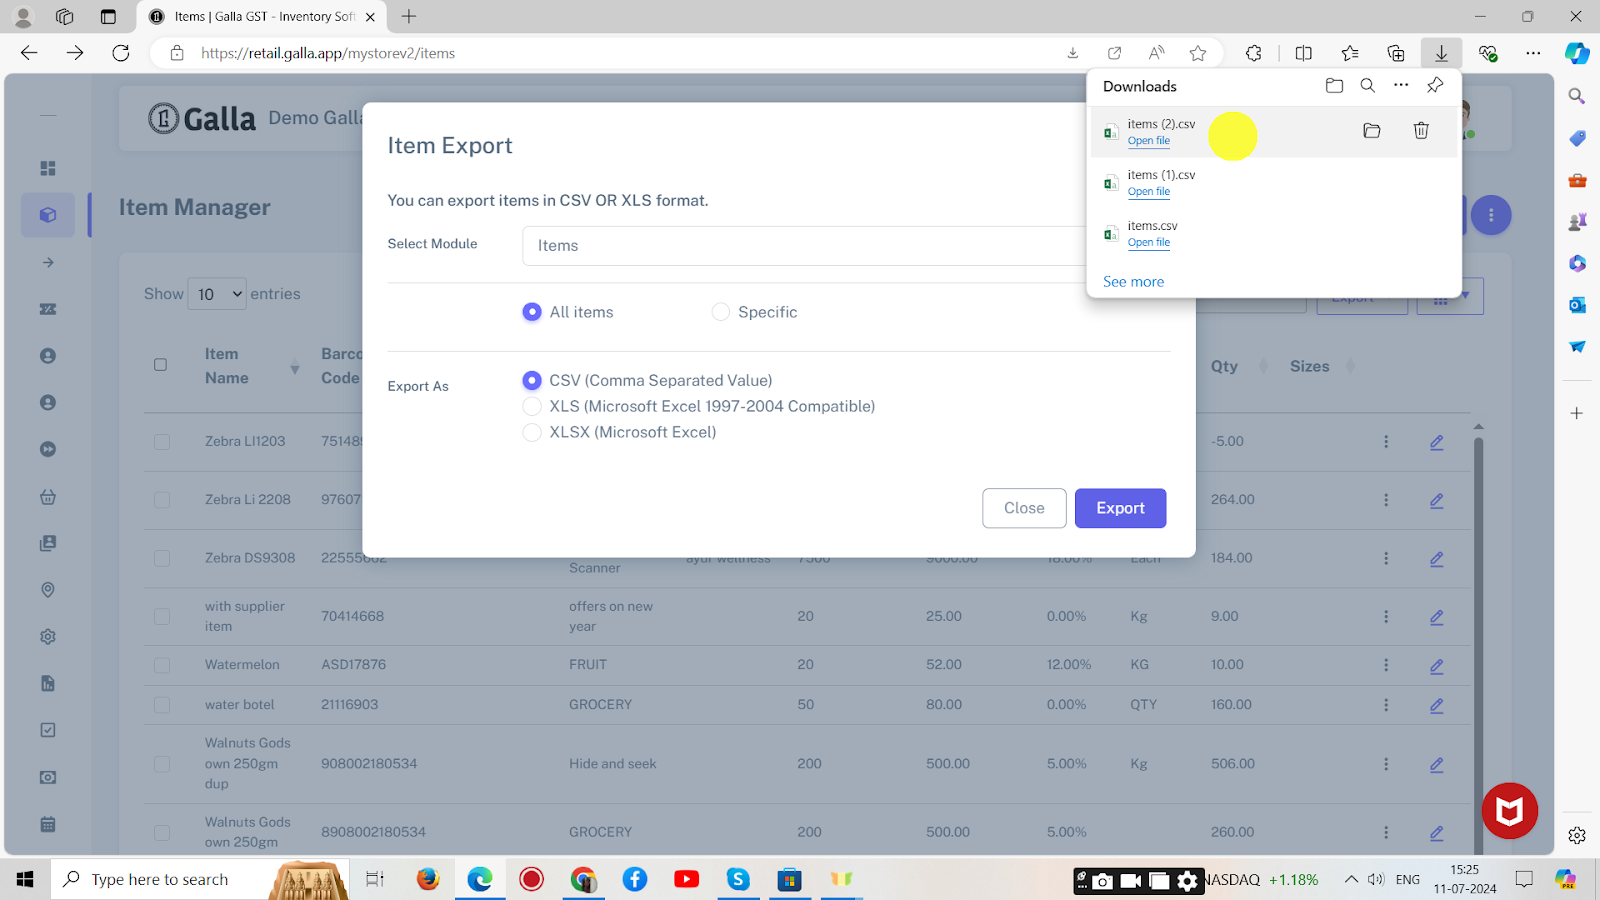
3. The page shown below will appear. Select module (items, or inventory) and Format (CSV or XLS), and click on Export.
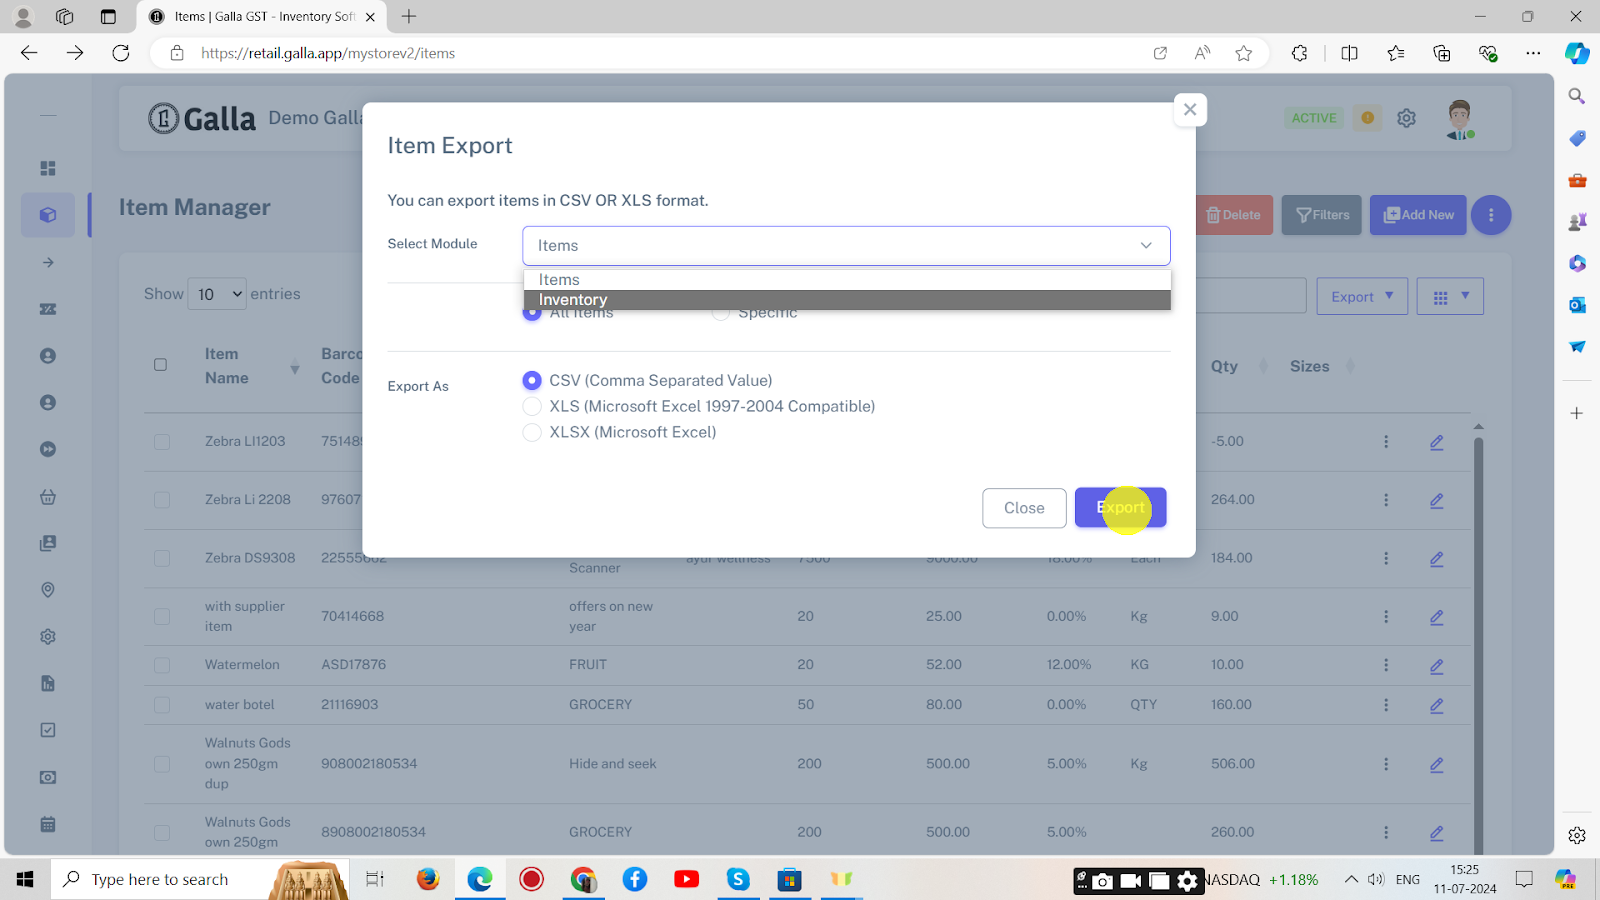
4. The file will be automatically downloaded and saved to the desktop.
