Sales
Sales Return
A return invoice, also known as a credit memo or credit note, is a document issued by a seller to a buyer to acknowledge the return of goods. This typically occurs when products are defective, damaged, or otherwise unsuitable, and the buyer needs to send them back to the seller. To create a return invoice, follow the following steps:
1. In the Retail Galla app, click on sales.
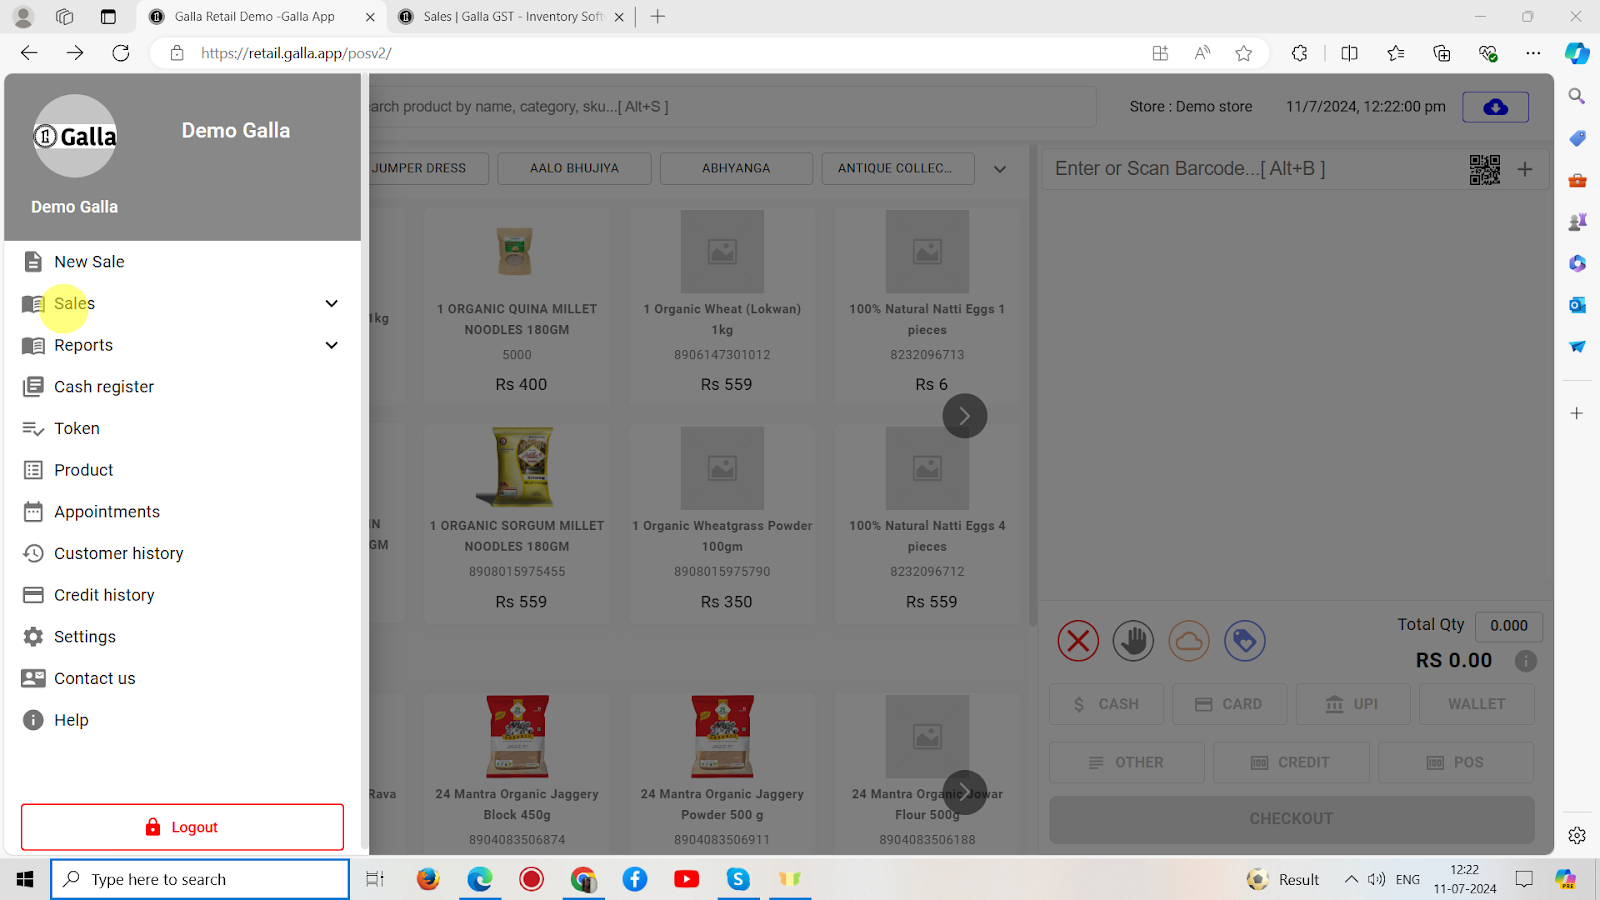
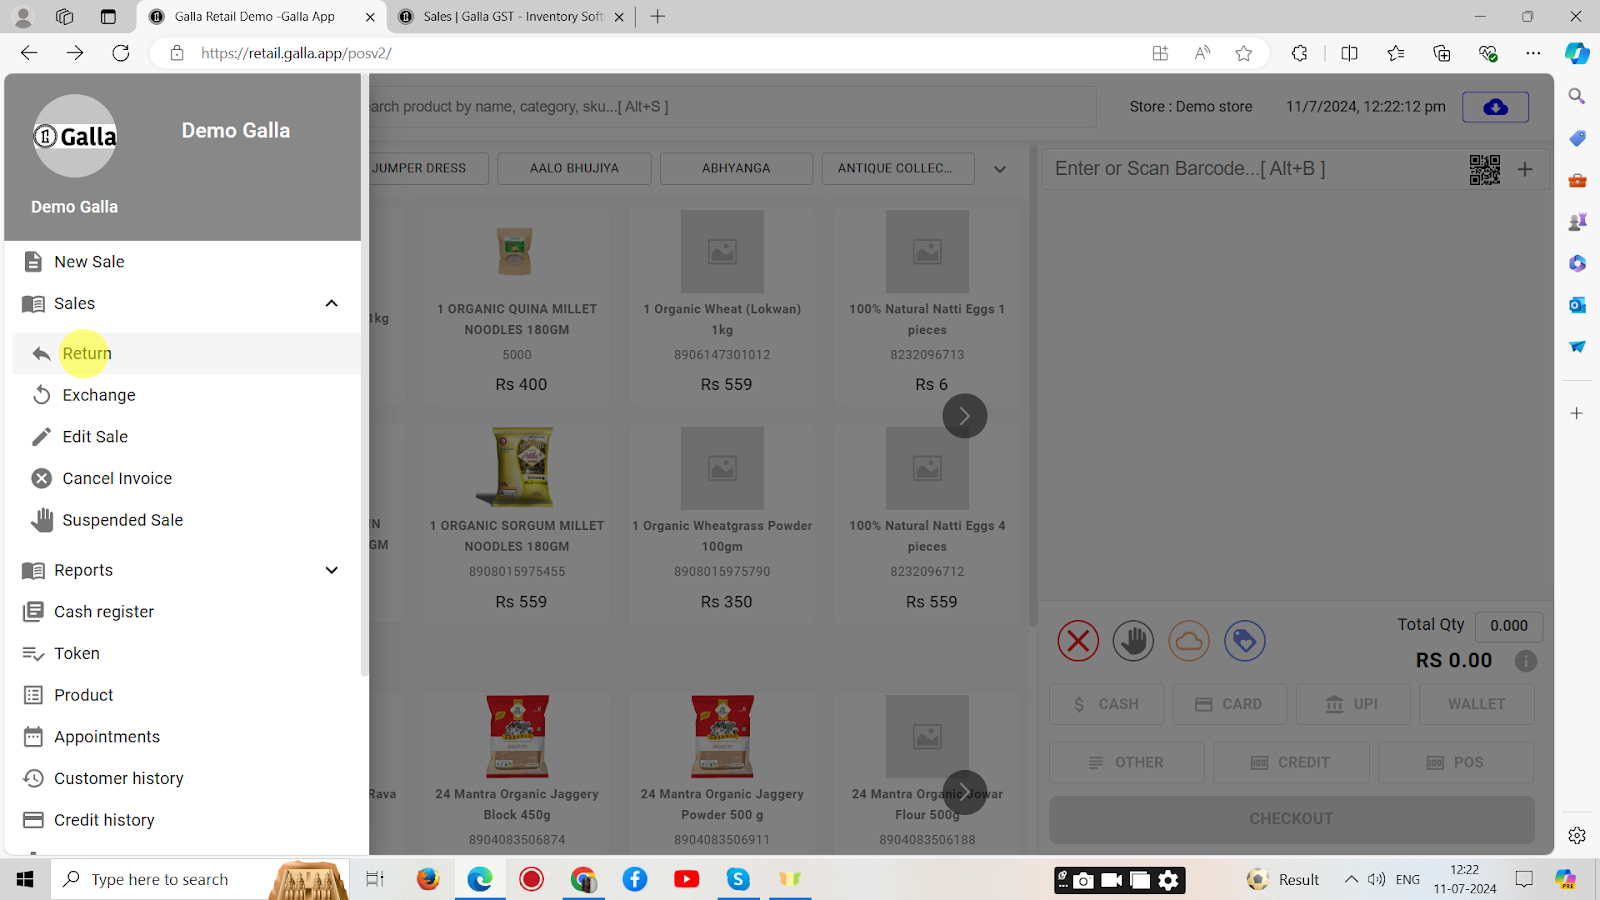
2. Select return.
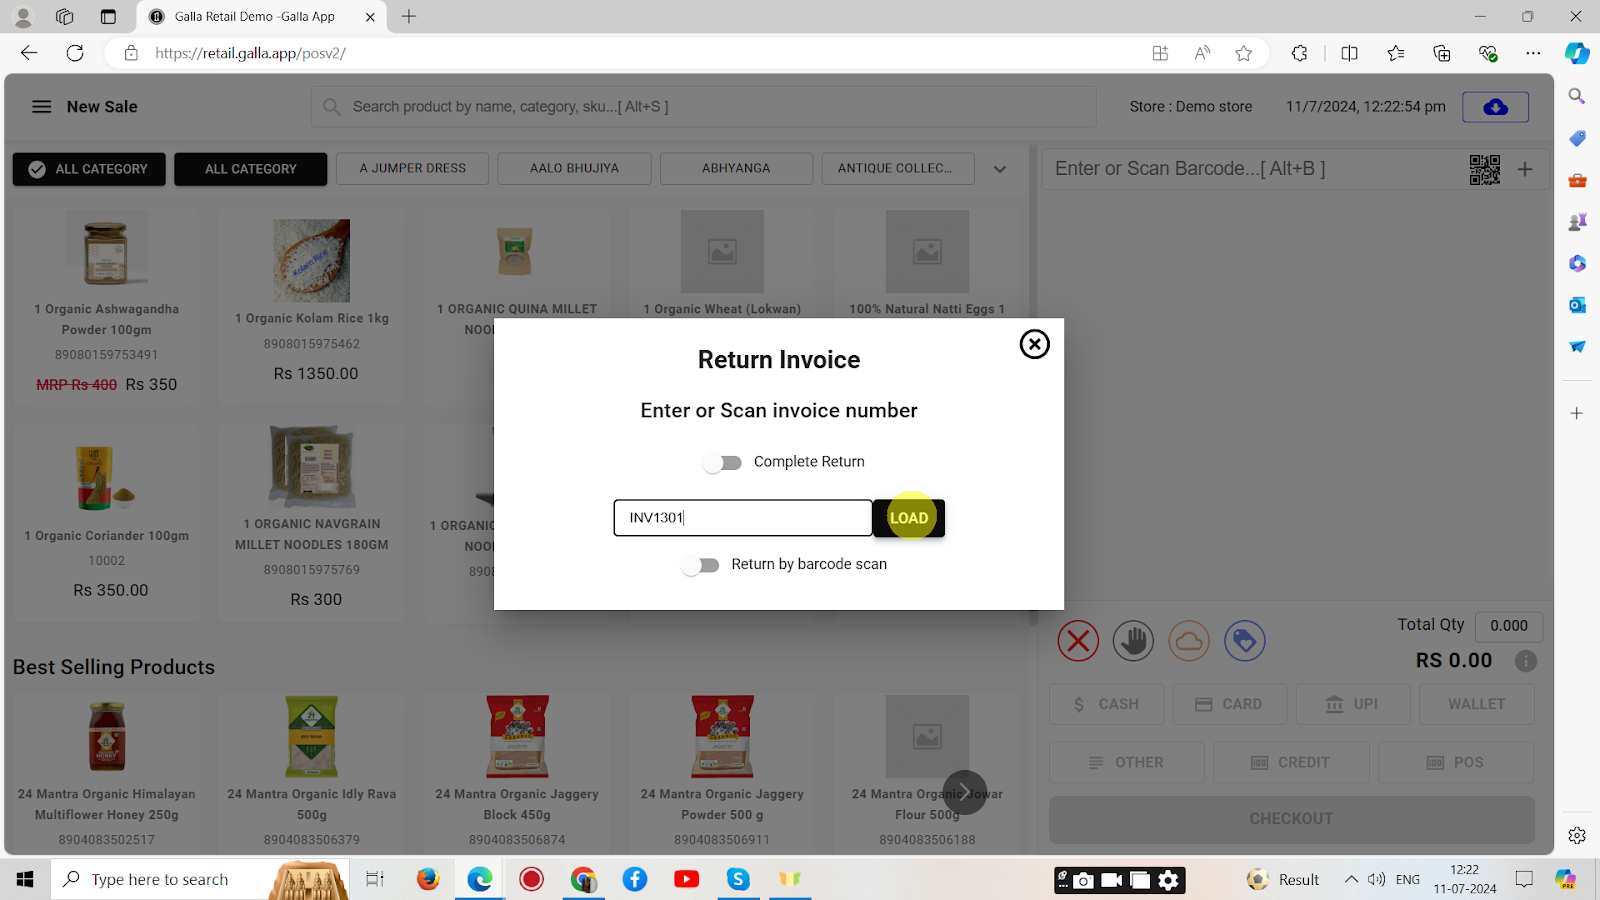
3. Enter the invoice number, as shown below.
4. Invoice details will appear. Now select the mode of payment as shown below.
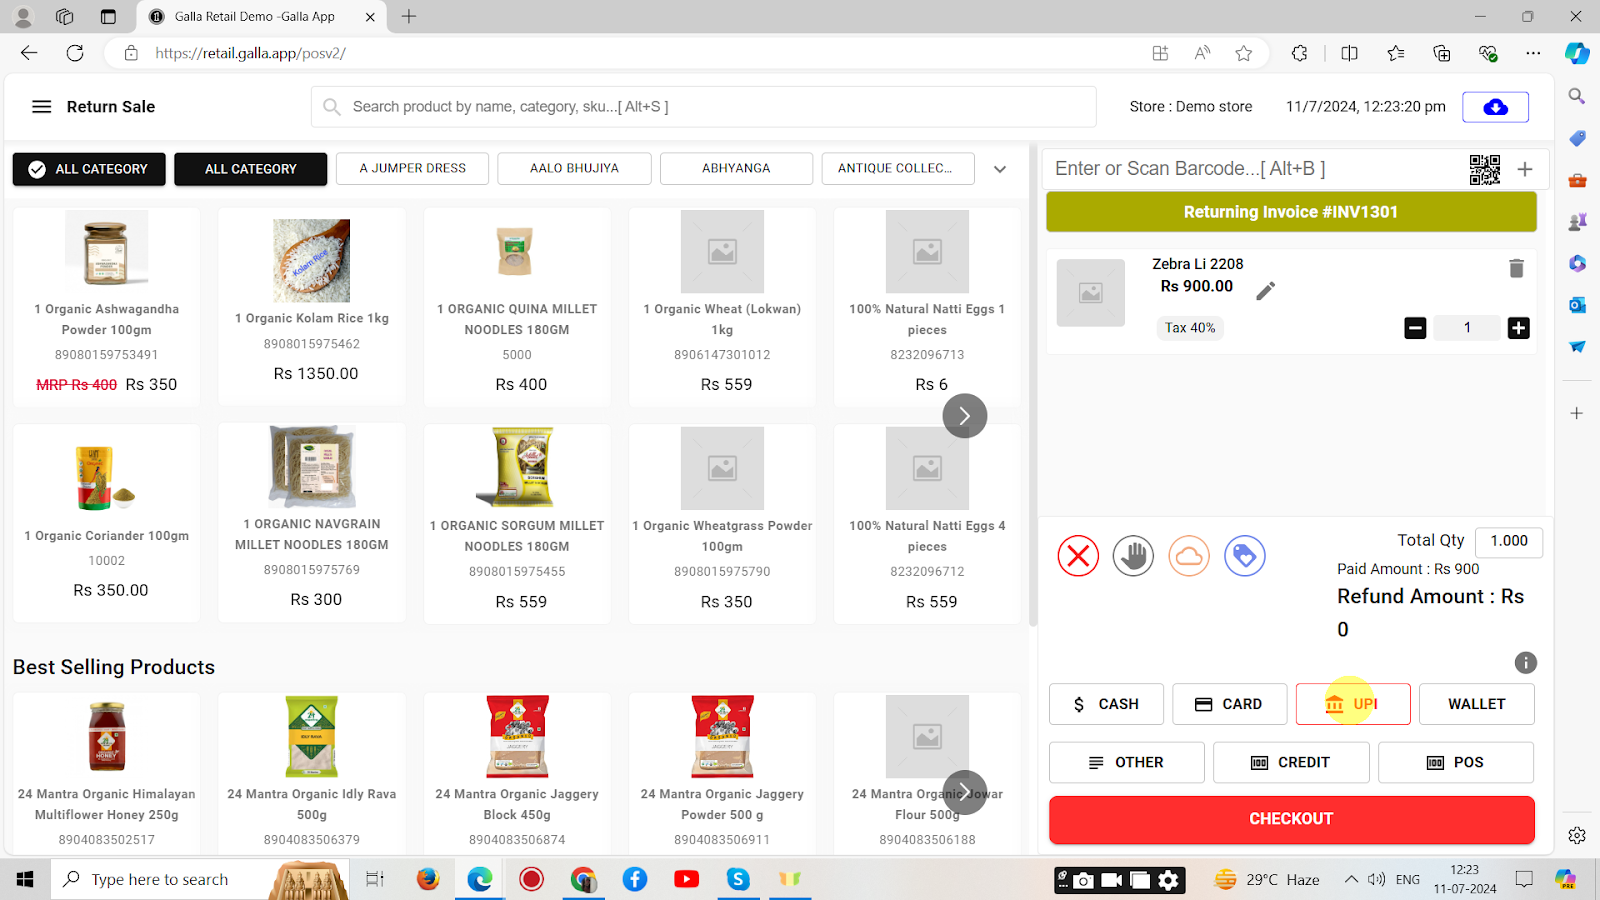
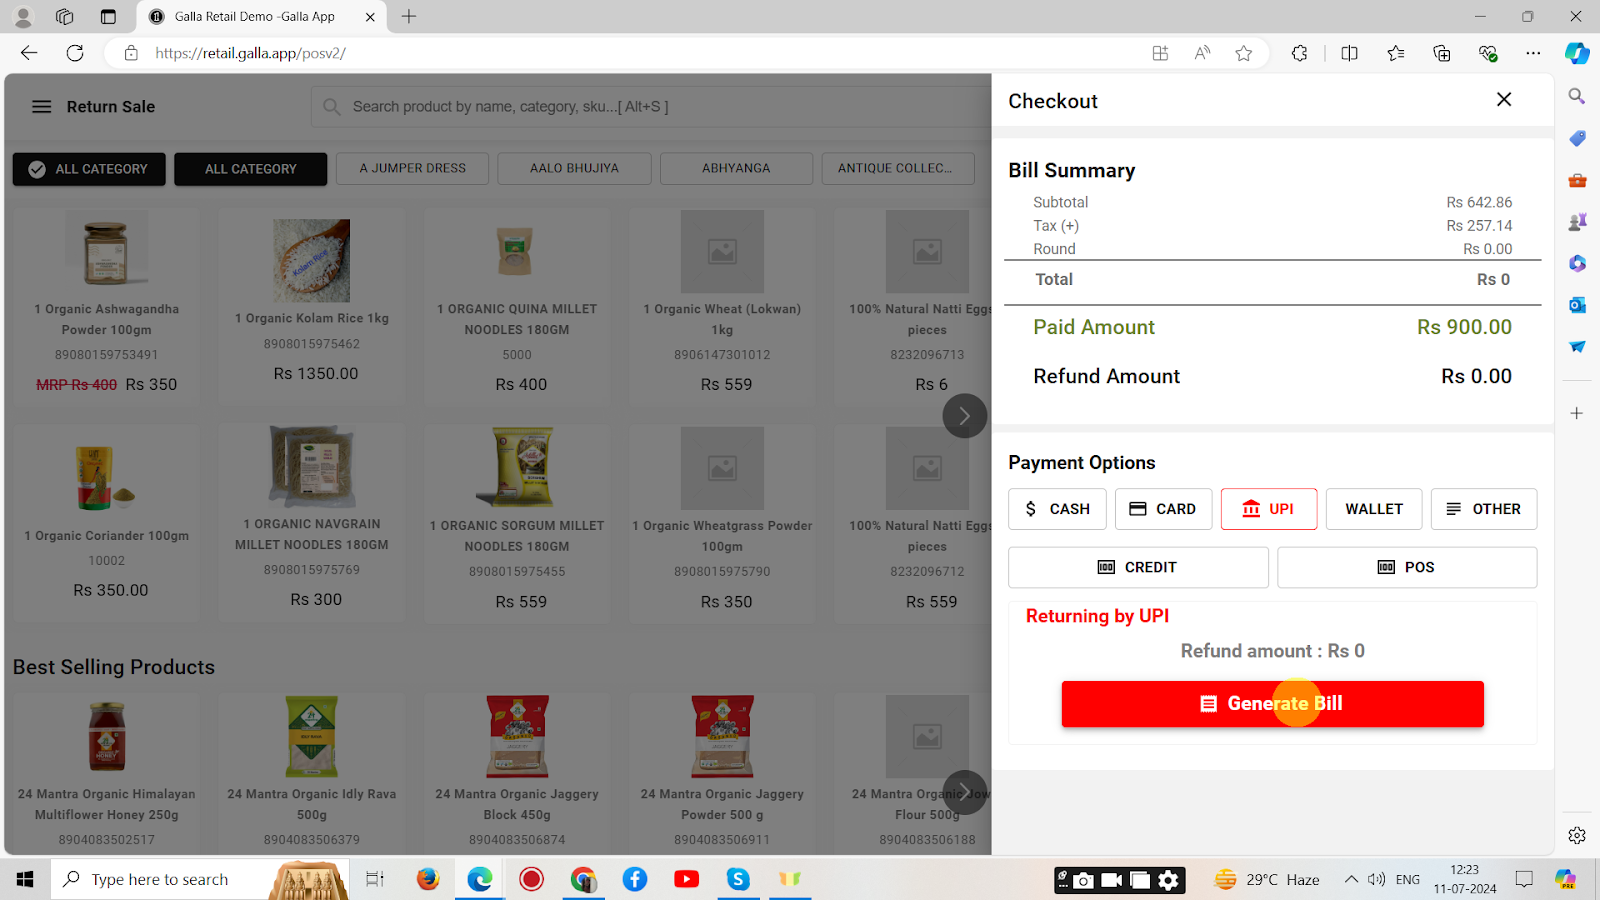
5. After selecting the payment mode, click on Generate Bill.
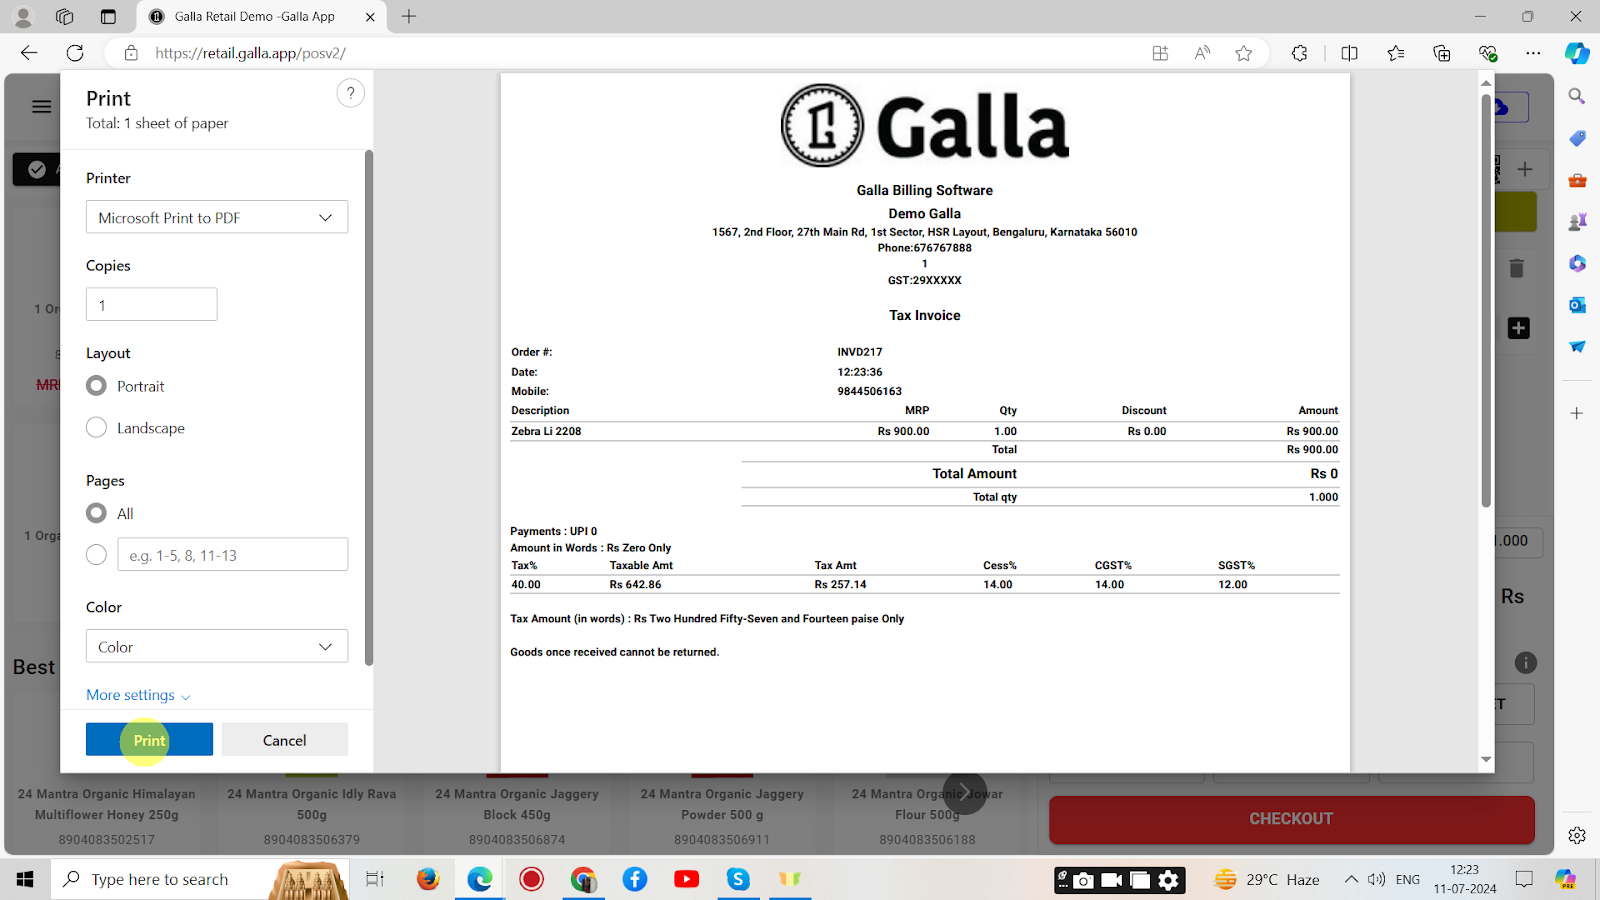
6. The bill will be displayed. To save and print it, click on print.
Sales Exchange
To create an exchange invoice, follow the following steps:
1. In the Retail Galla app, click on sales.
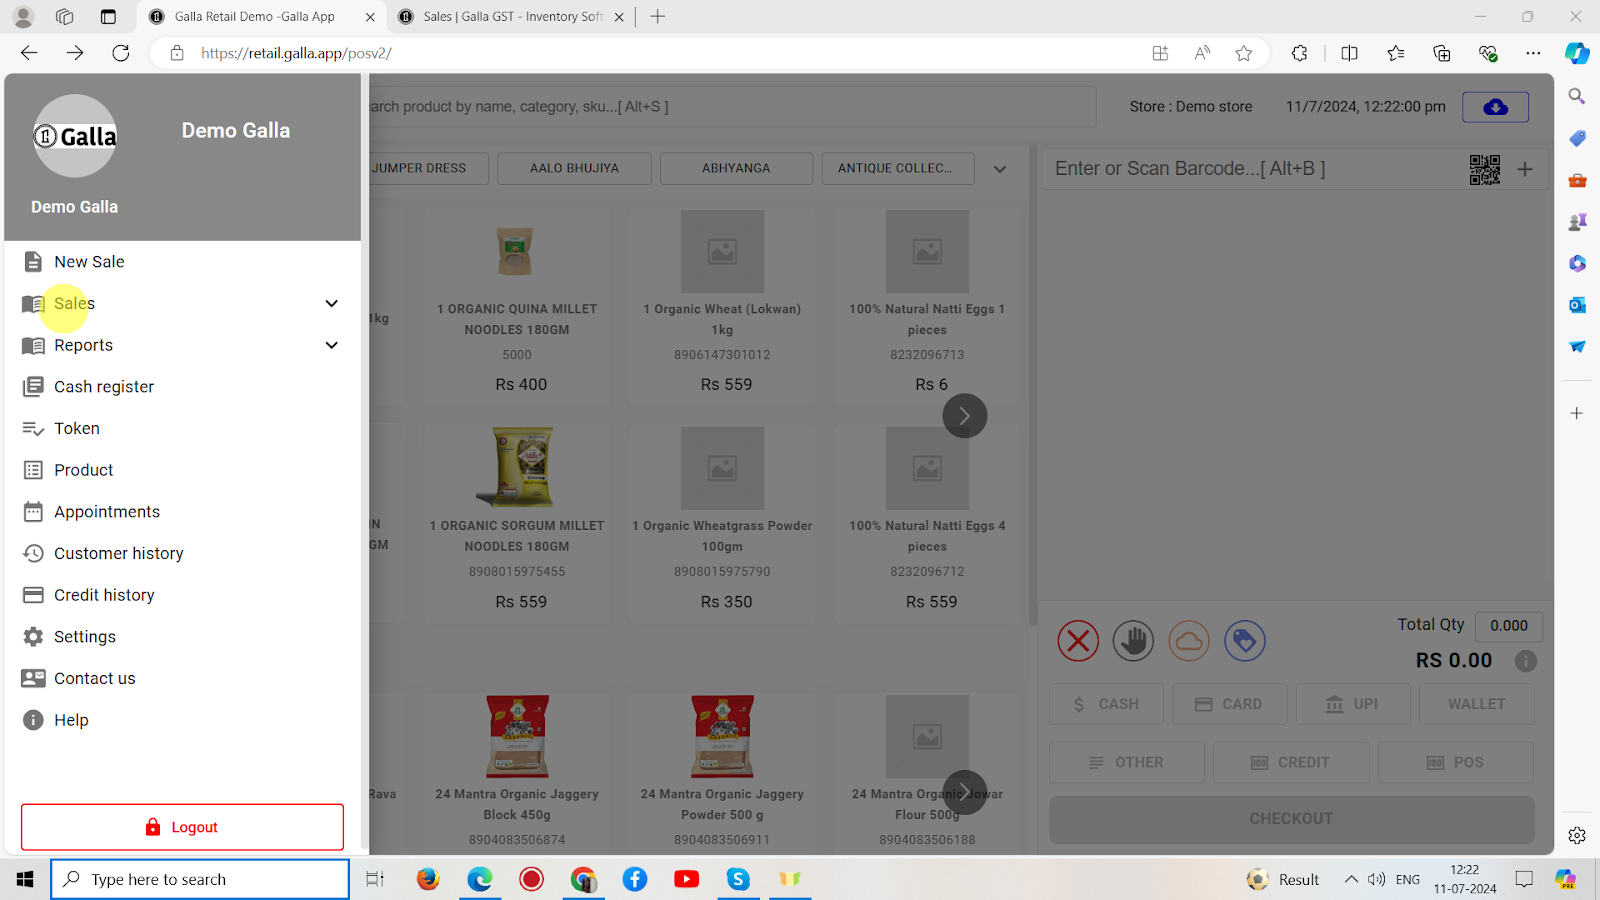
2. Select exchange.
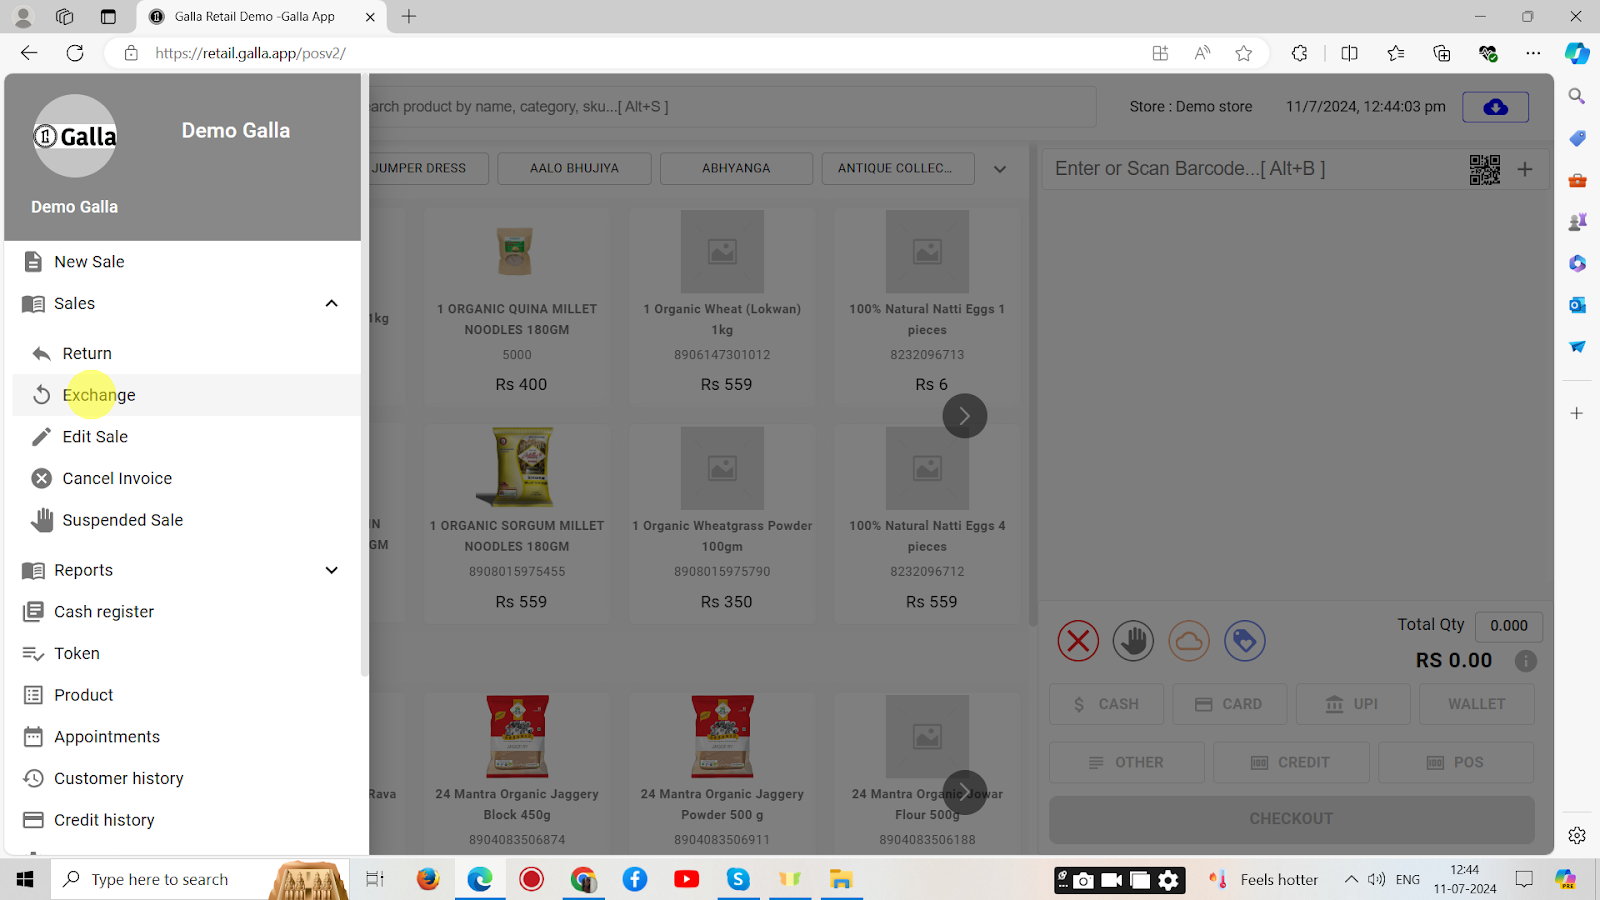
3. Enter invoice details, as shown below.
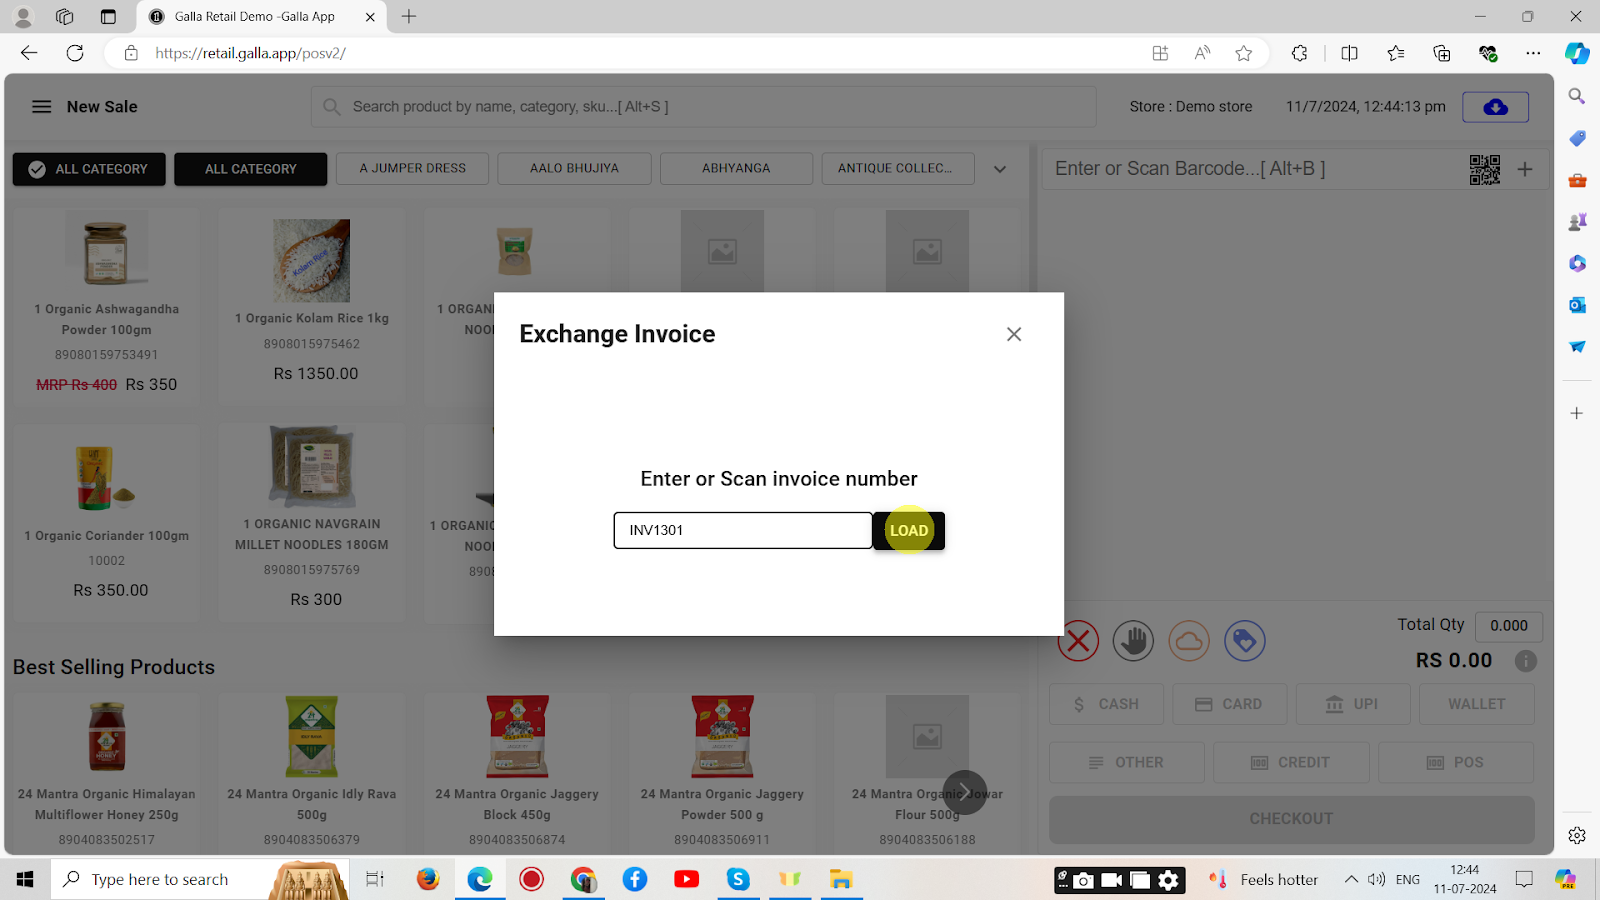
4. Exchanging Invoice details will appear. Select the mode of payment and click on checkout.
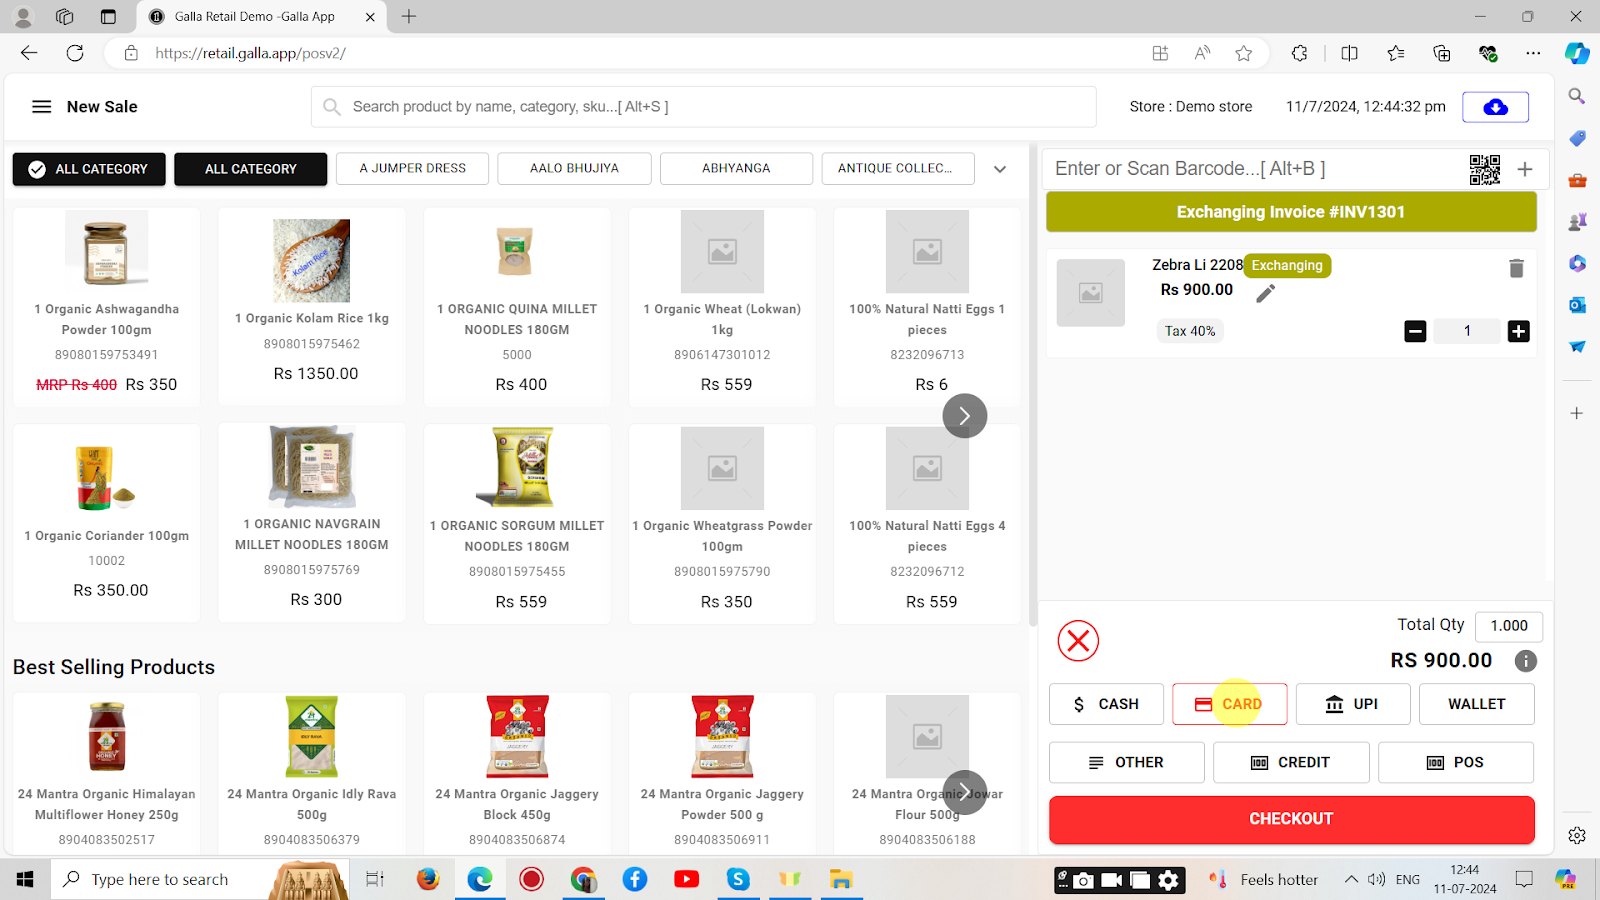
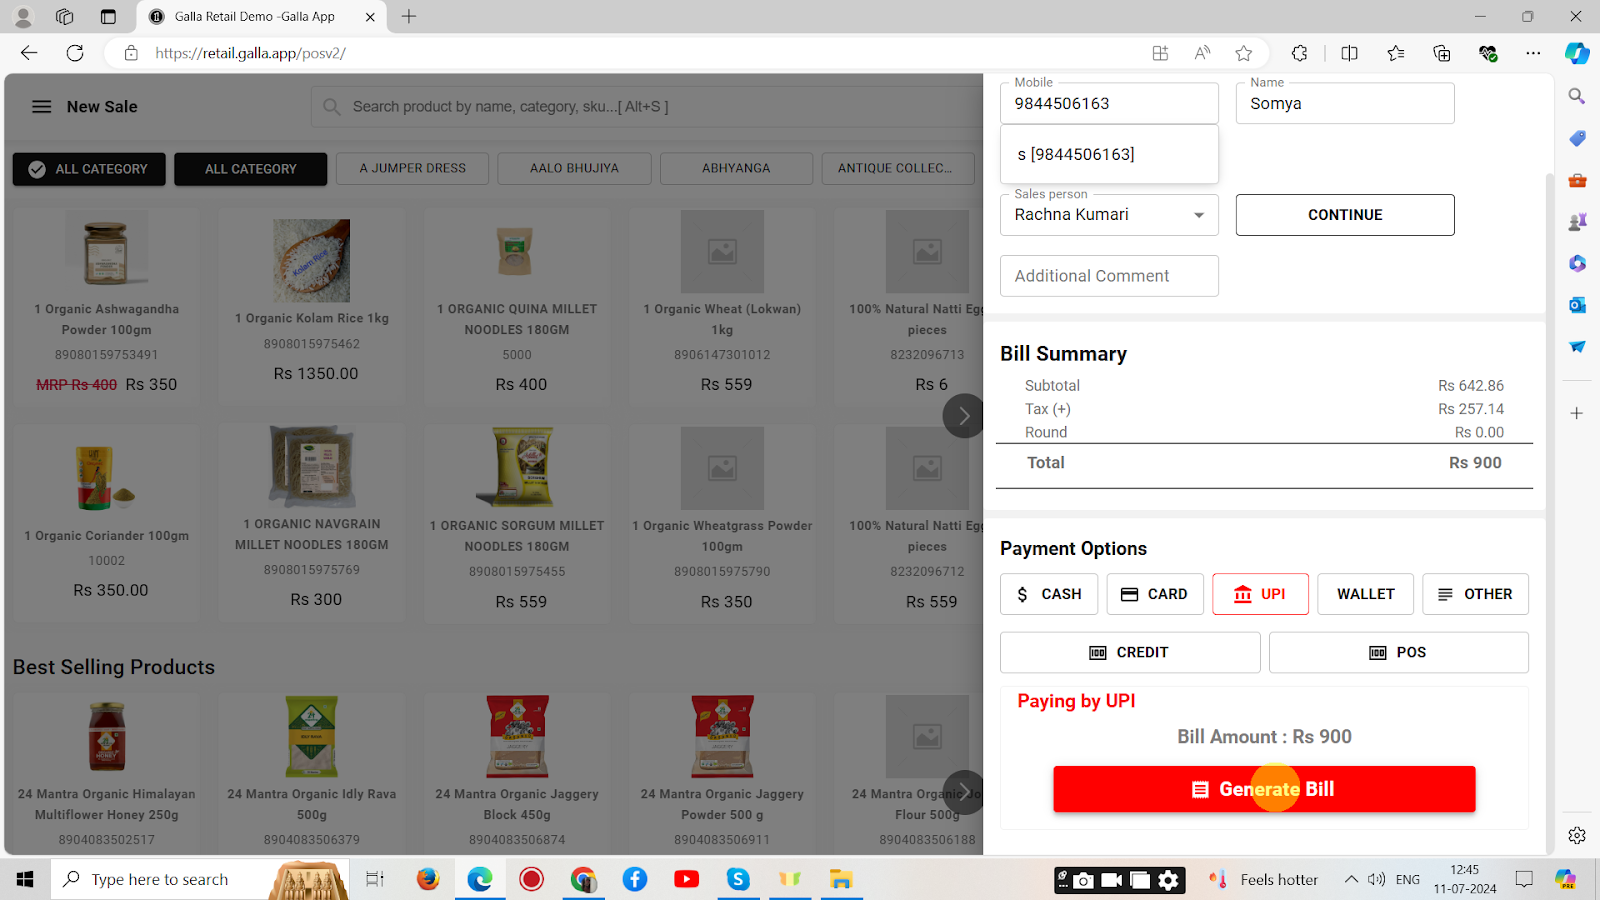
5. On clicking on checkout, the page shown below will appear. Fill in the customer details like name, phone number, etc., and select any payment mode – Cash, Card, UPI, Wallet, Other.
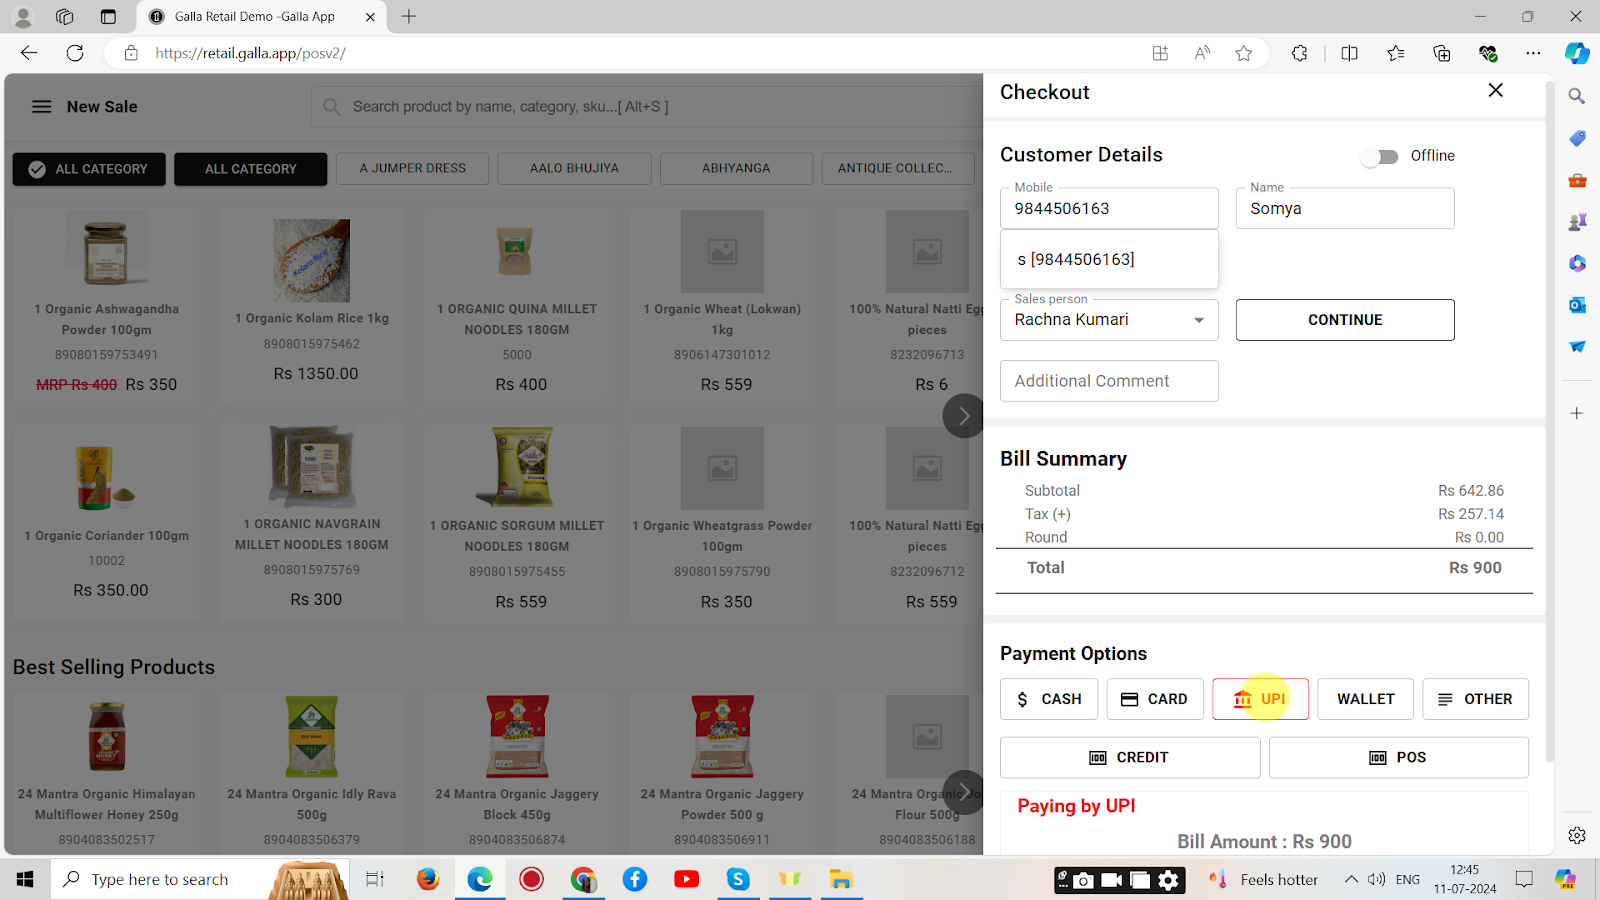
6. After selecting the payment mode, click on Generate Bill.
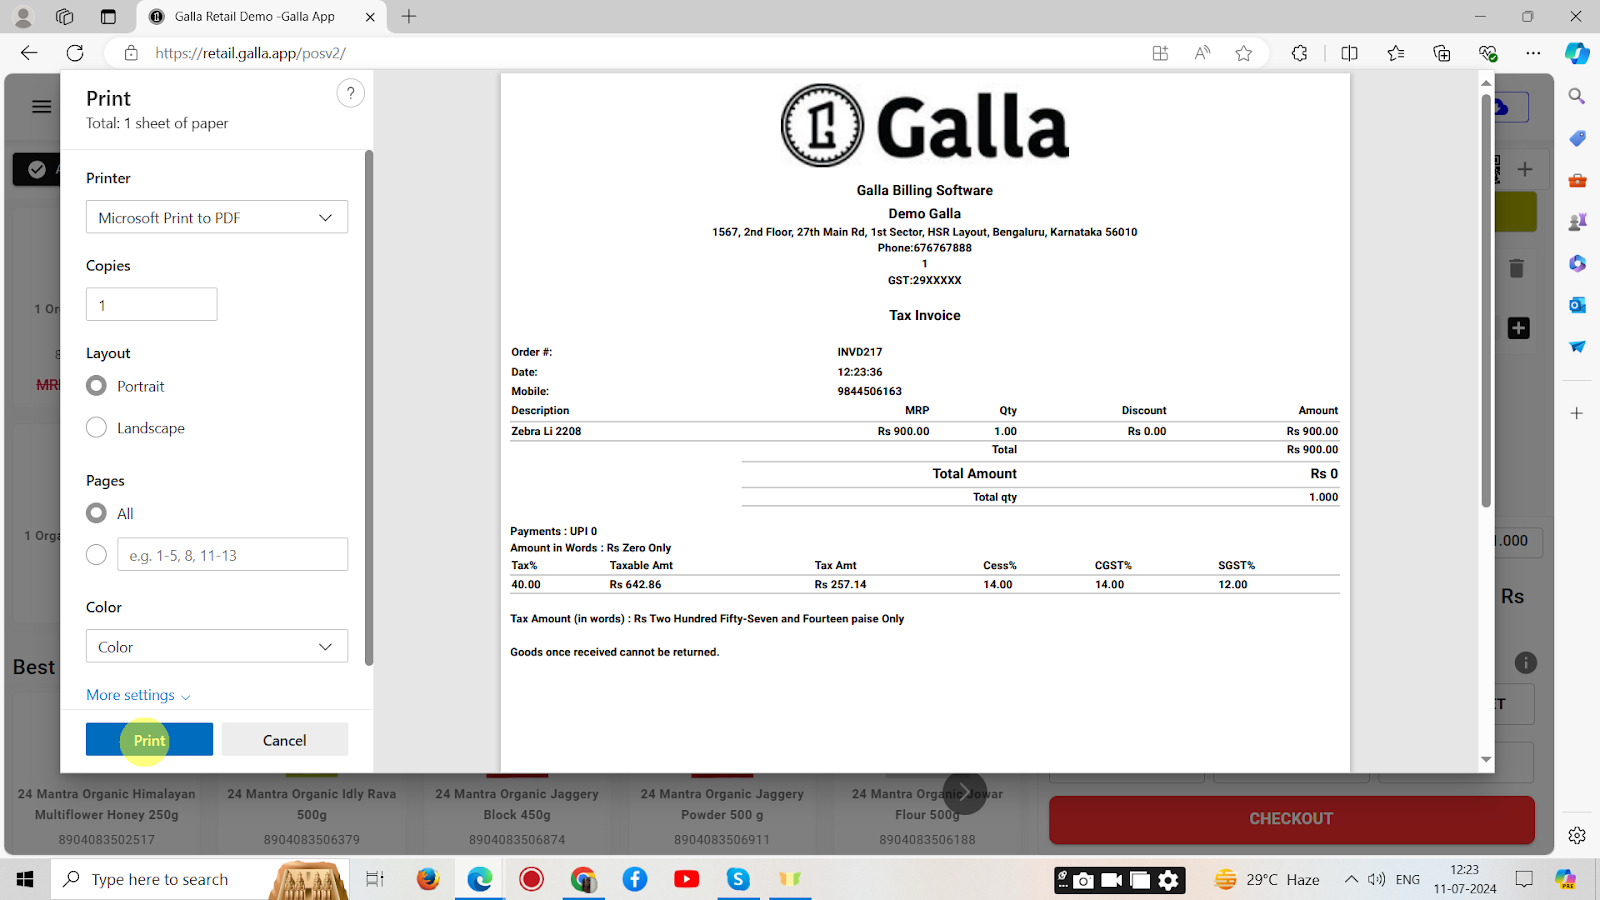
7. The bill will be displayed. To save and print it, click on print.
Sales Edit
The edit invoice feature allows sellers to modify existing invoices, updating details such as item descriptions, discounts, quantities, prices, or customer information to ensure accuracy and reflect changes. To edit an invoice, follow the following steps:
1. In the Retail Galla app, click on sales.
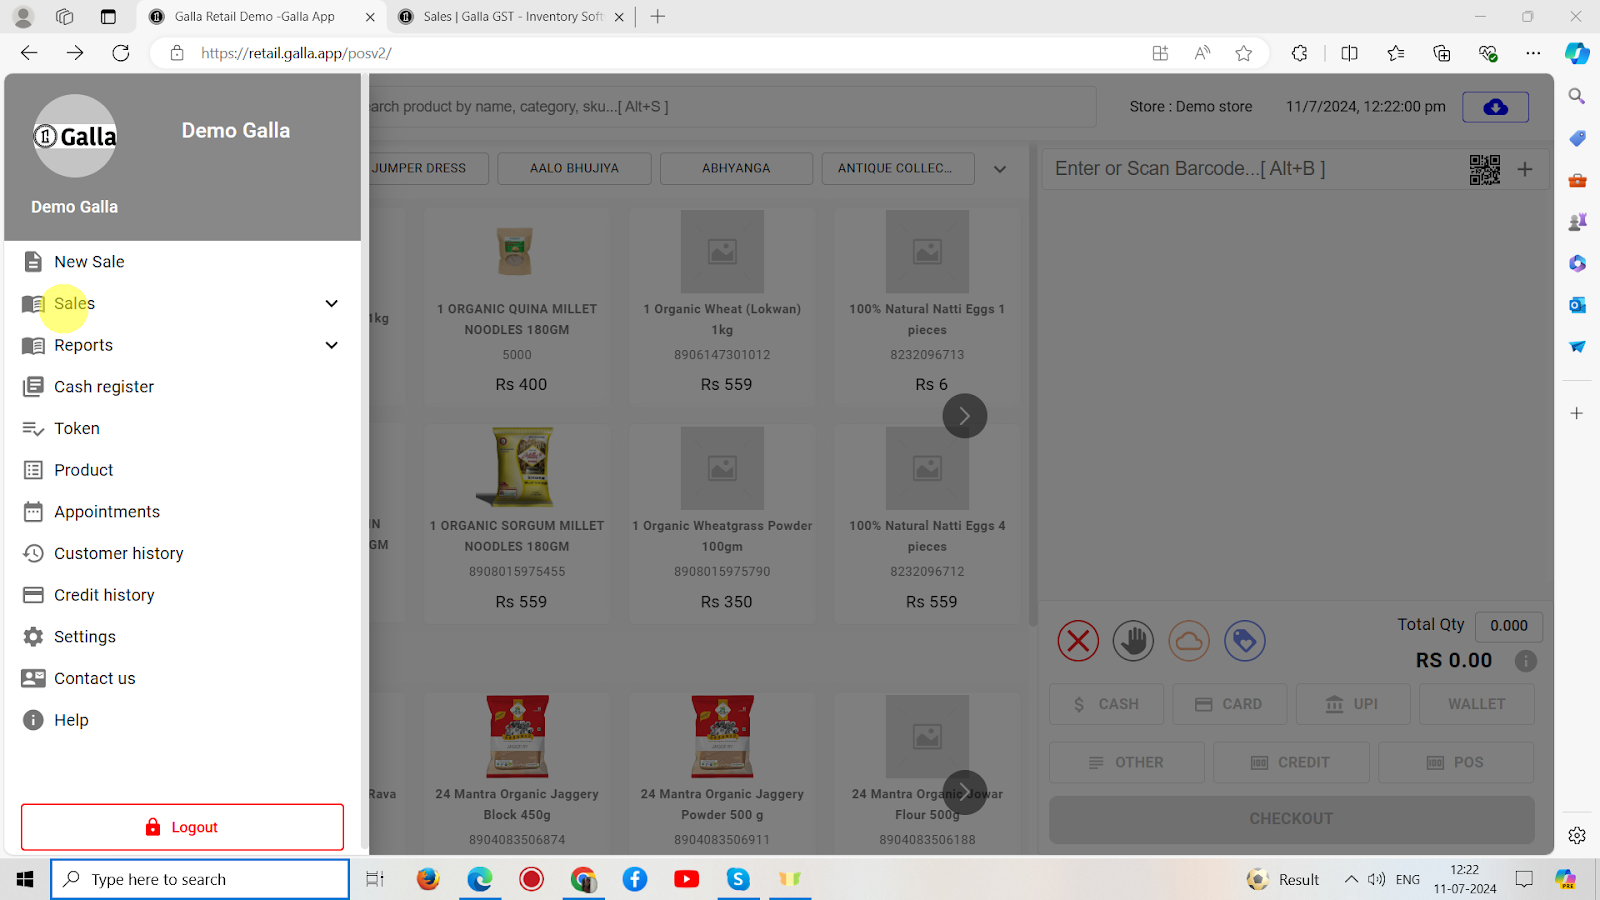
2. Select edit sale.
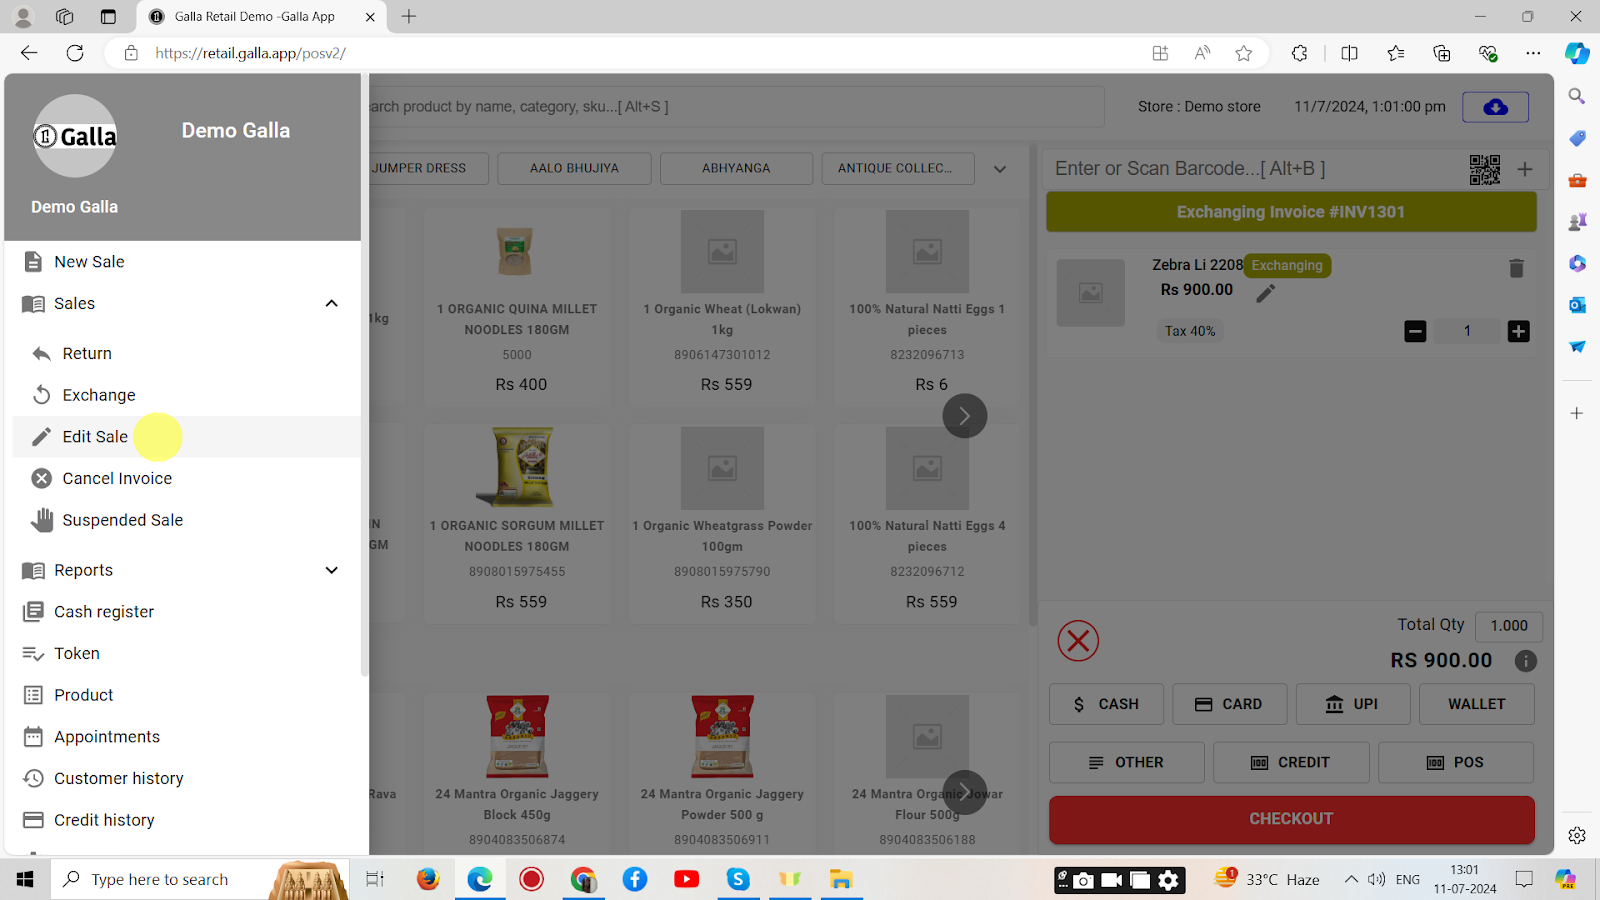
3. Enter invoice number, as shown below.
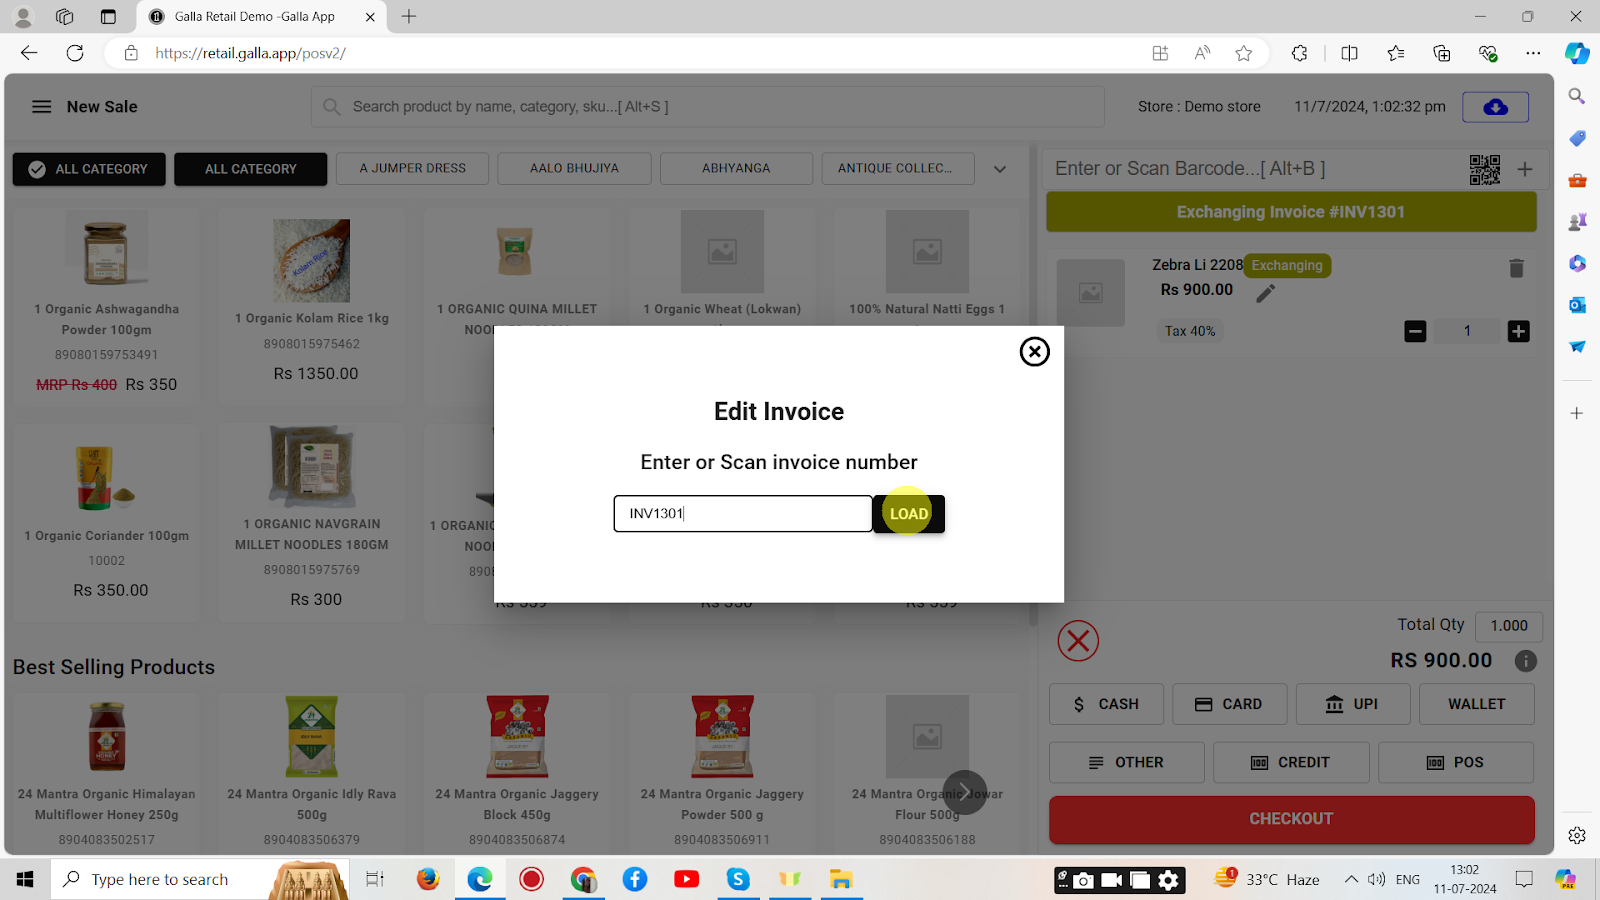
4. Invoice details will appear (Currently, it shows Rs. 900/-). Now, Click on the pen icon to edit the invoice.
5. Edit the invoice details and click apply, as shown below.
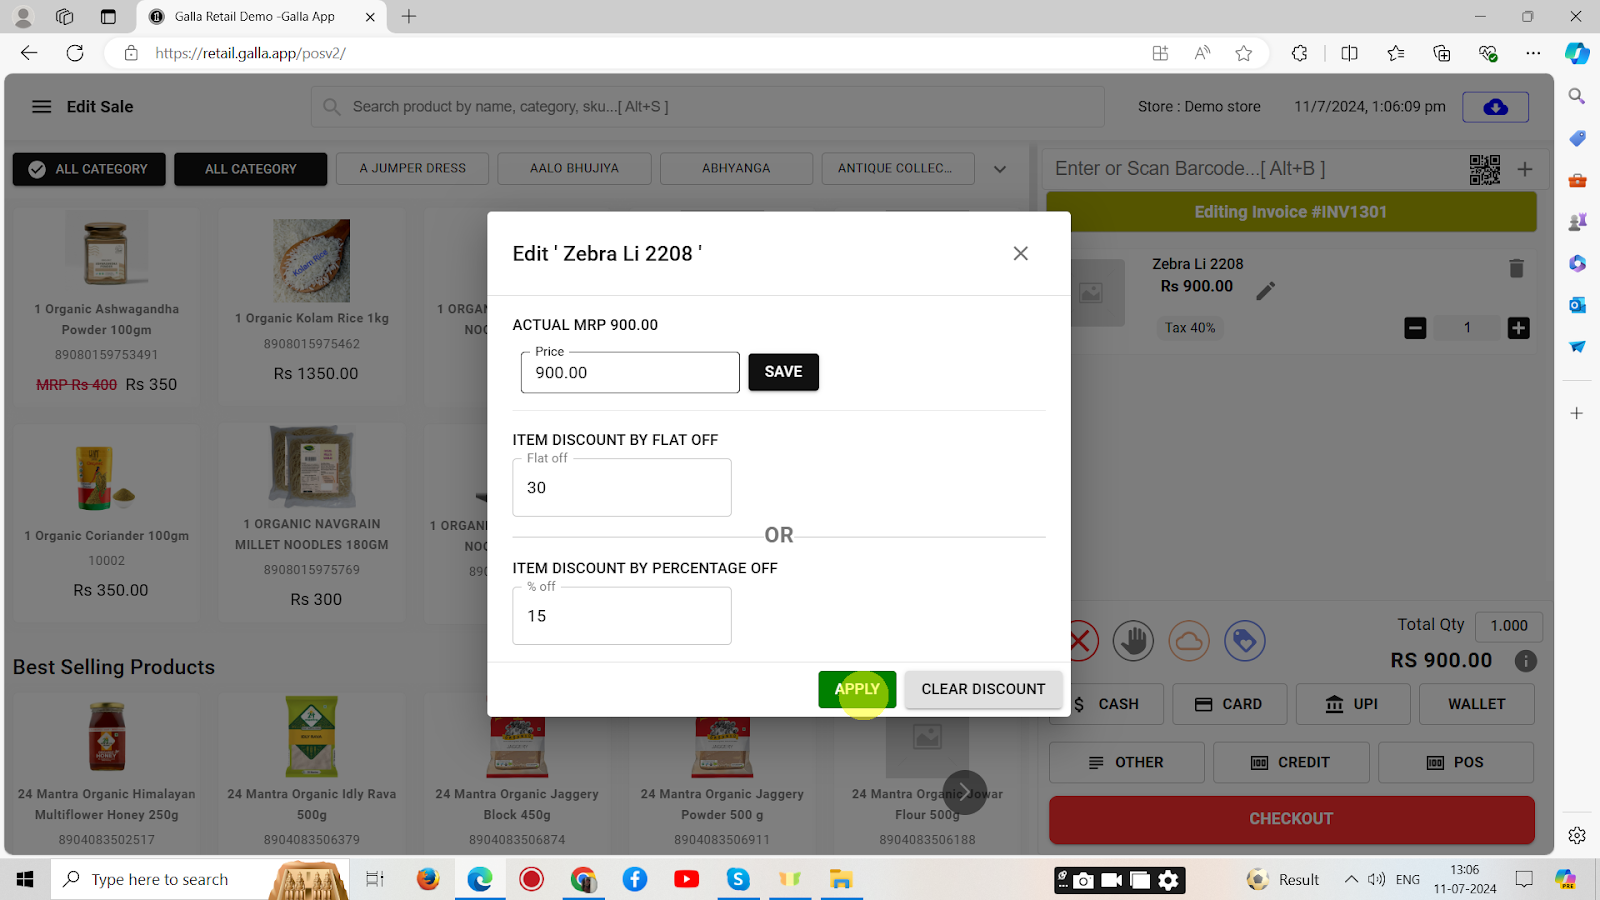
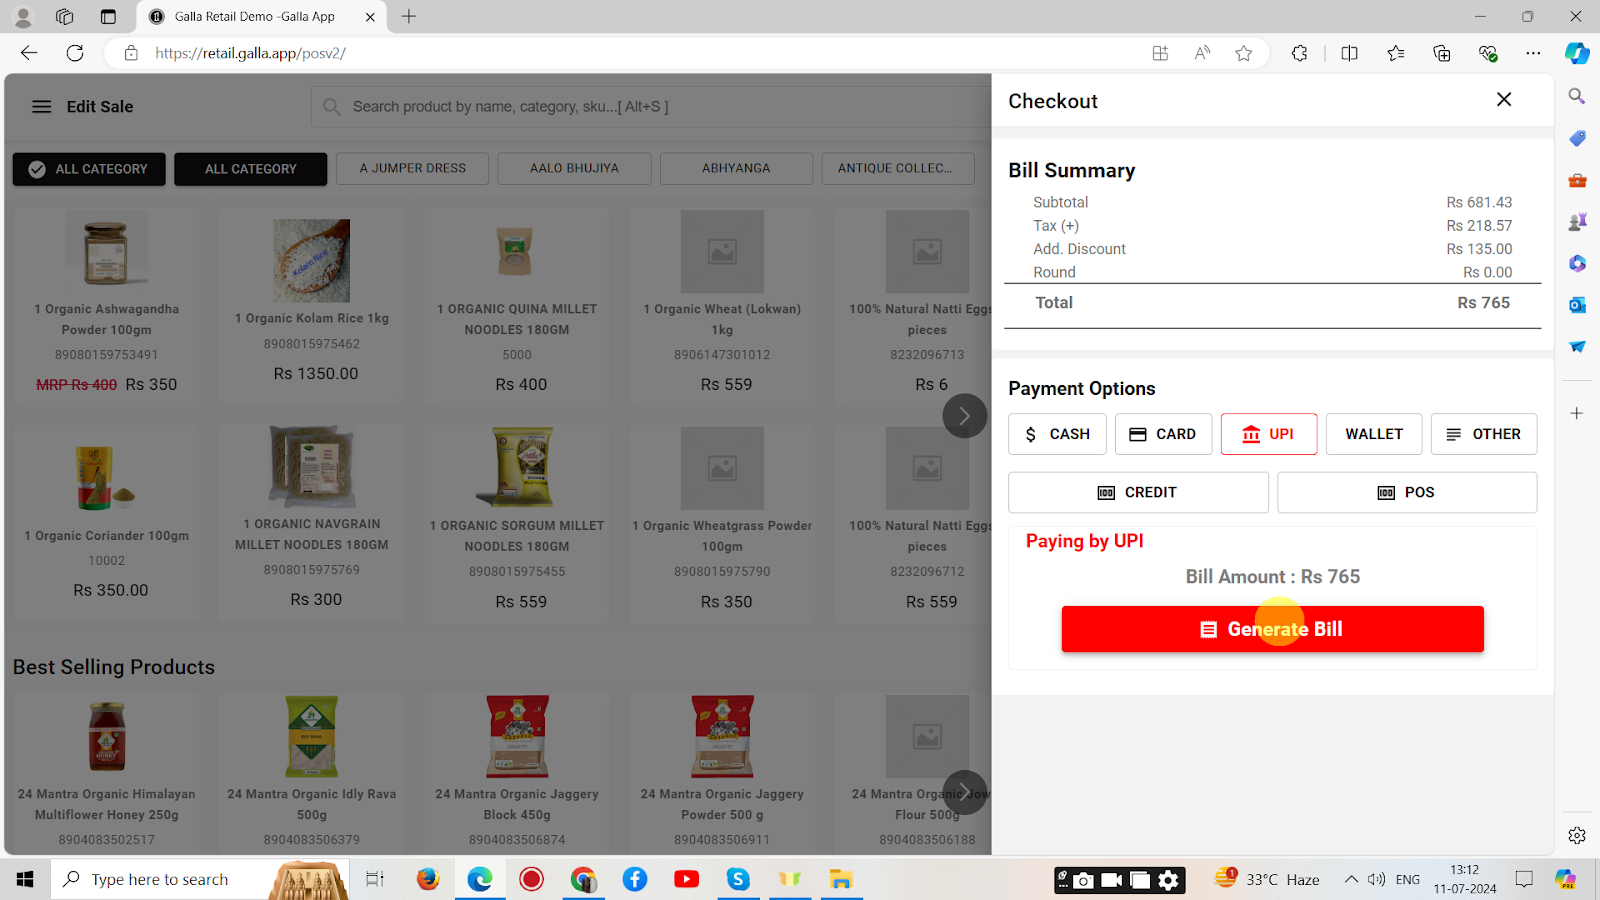
6. The invoice has been edited (A 15% discount has been applied, and the total amount shows 765/-).
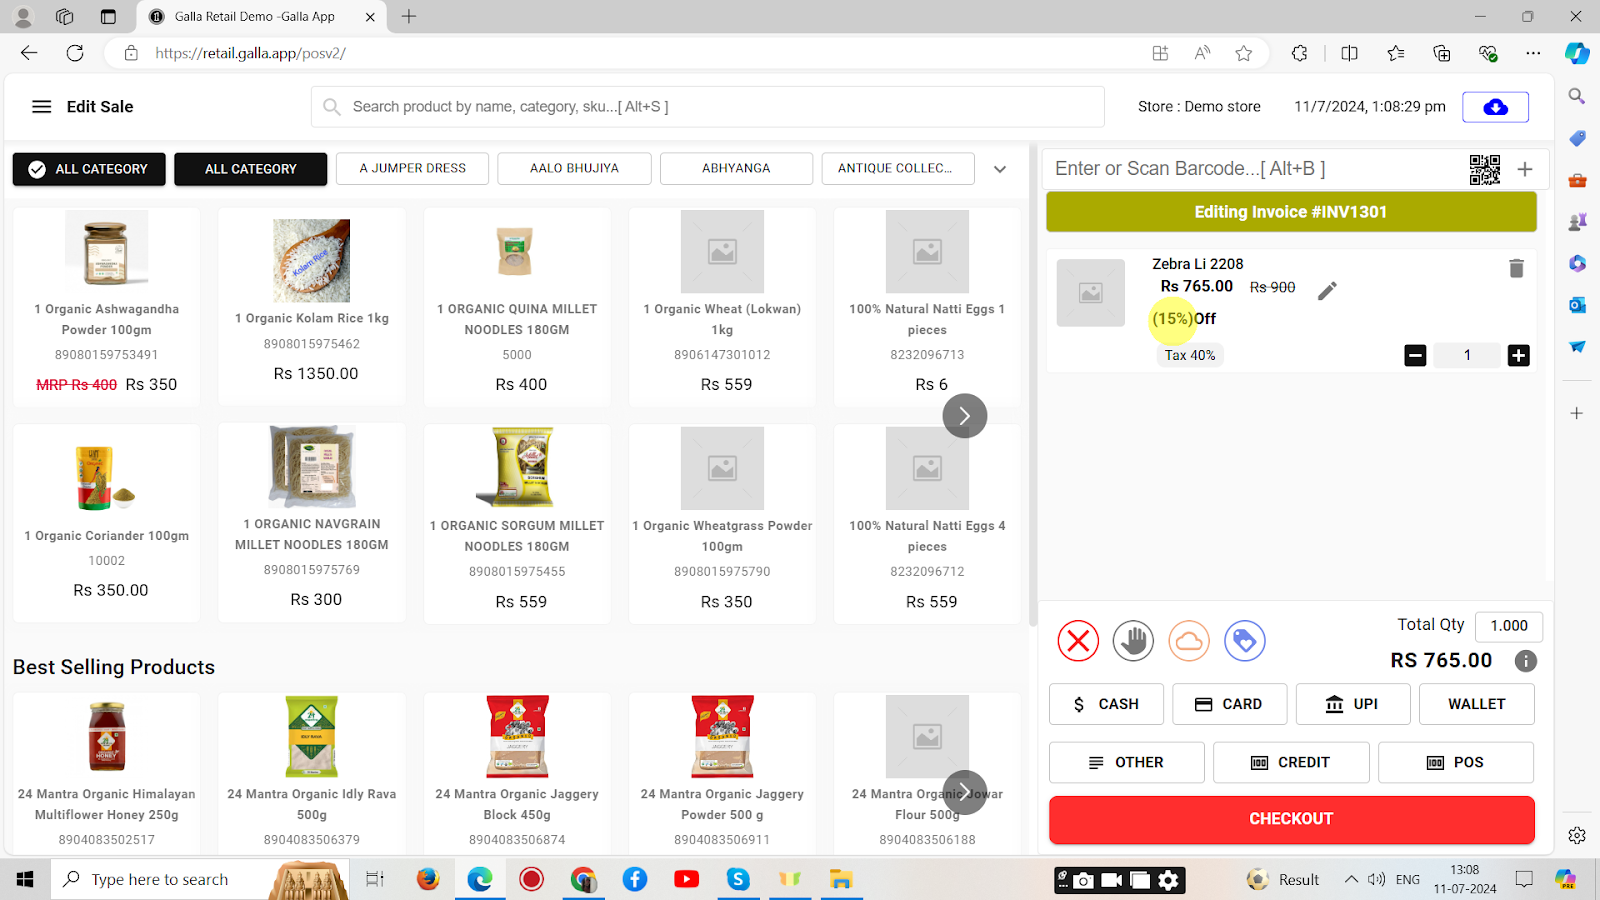
7. Now select the payment mode as shown below.
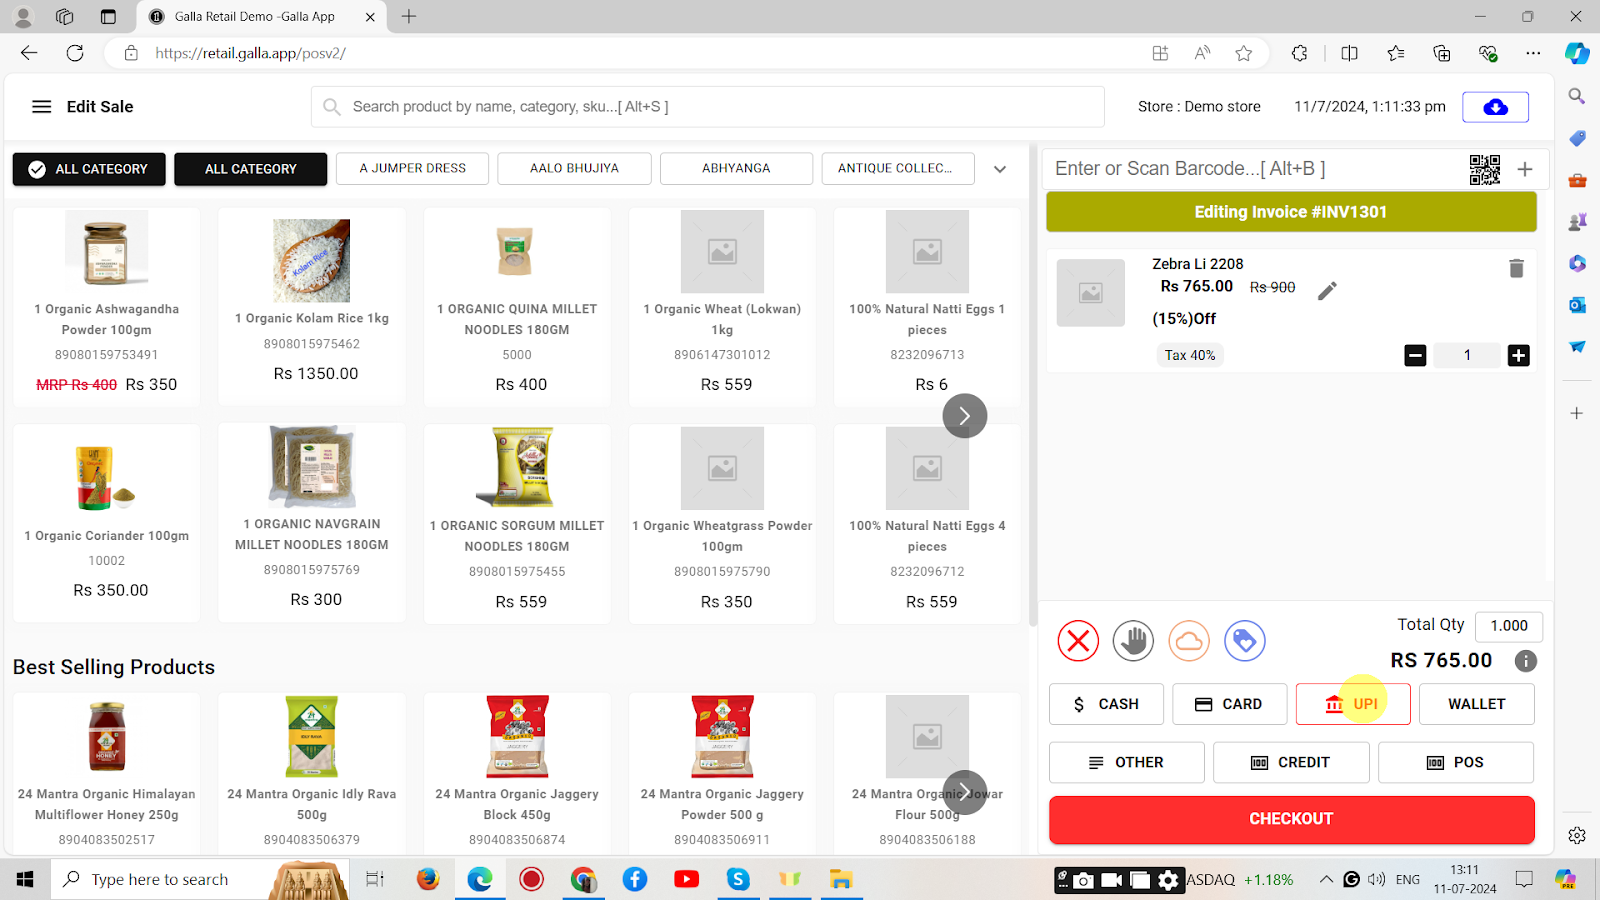
8. Click on generate bill.
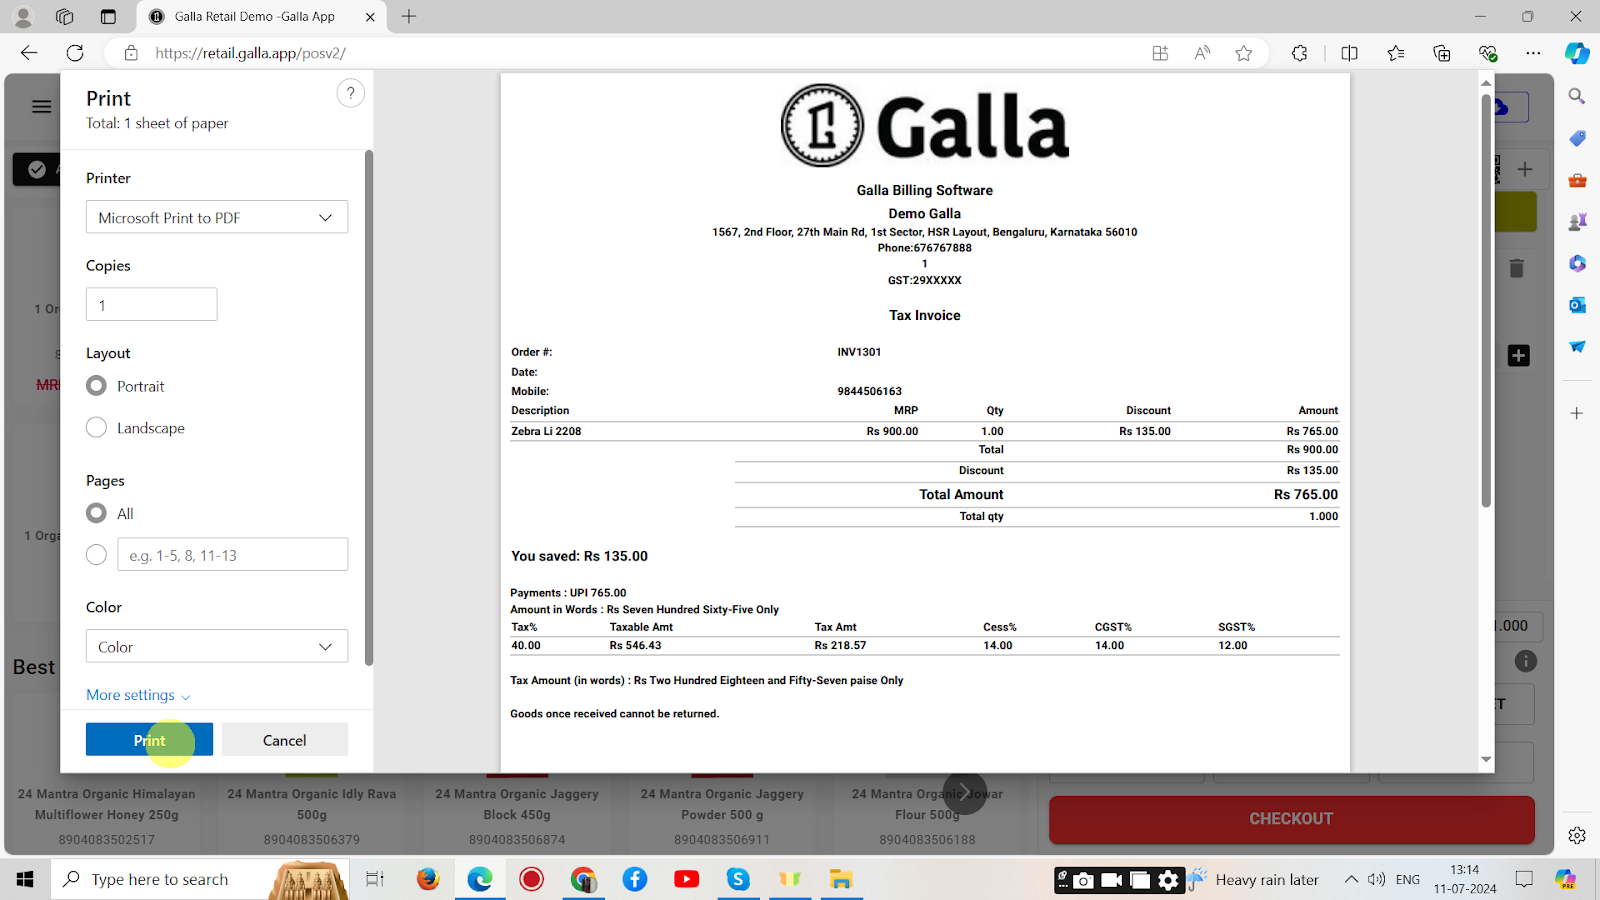
9. The invoice will appear. Click on print to save and print it.
Sales Cancel
Cancelling an invoice involves voiding a previously issued invoice, often due to errors or changes in the transaction. It ensures the invoice no longer affects accounting records or payment obligations. To cancel an invoice, follow the steps shown below:
1. In the Retail Galla app, click on sales.
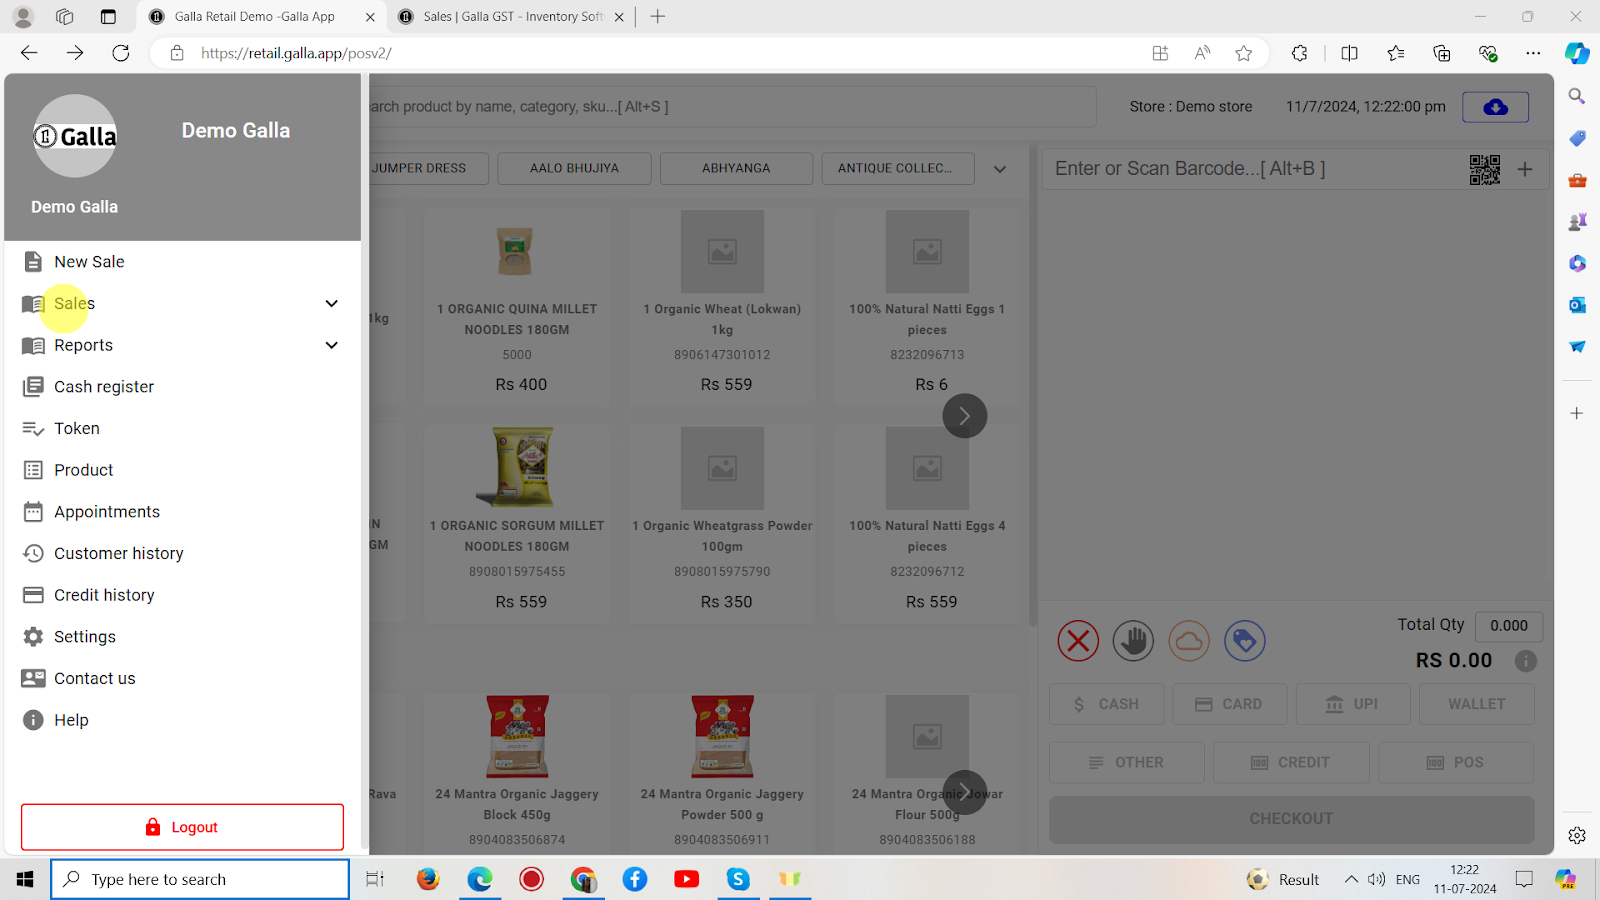
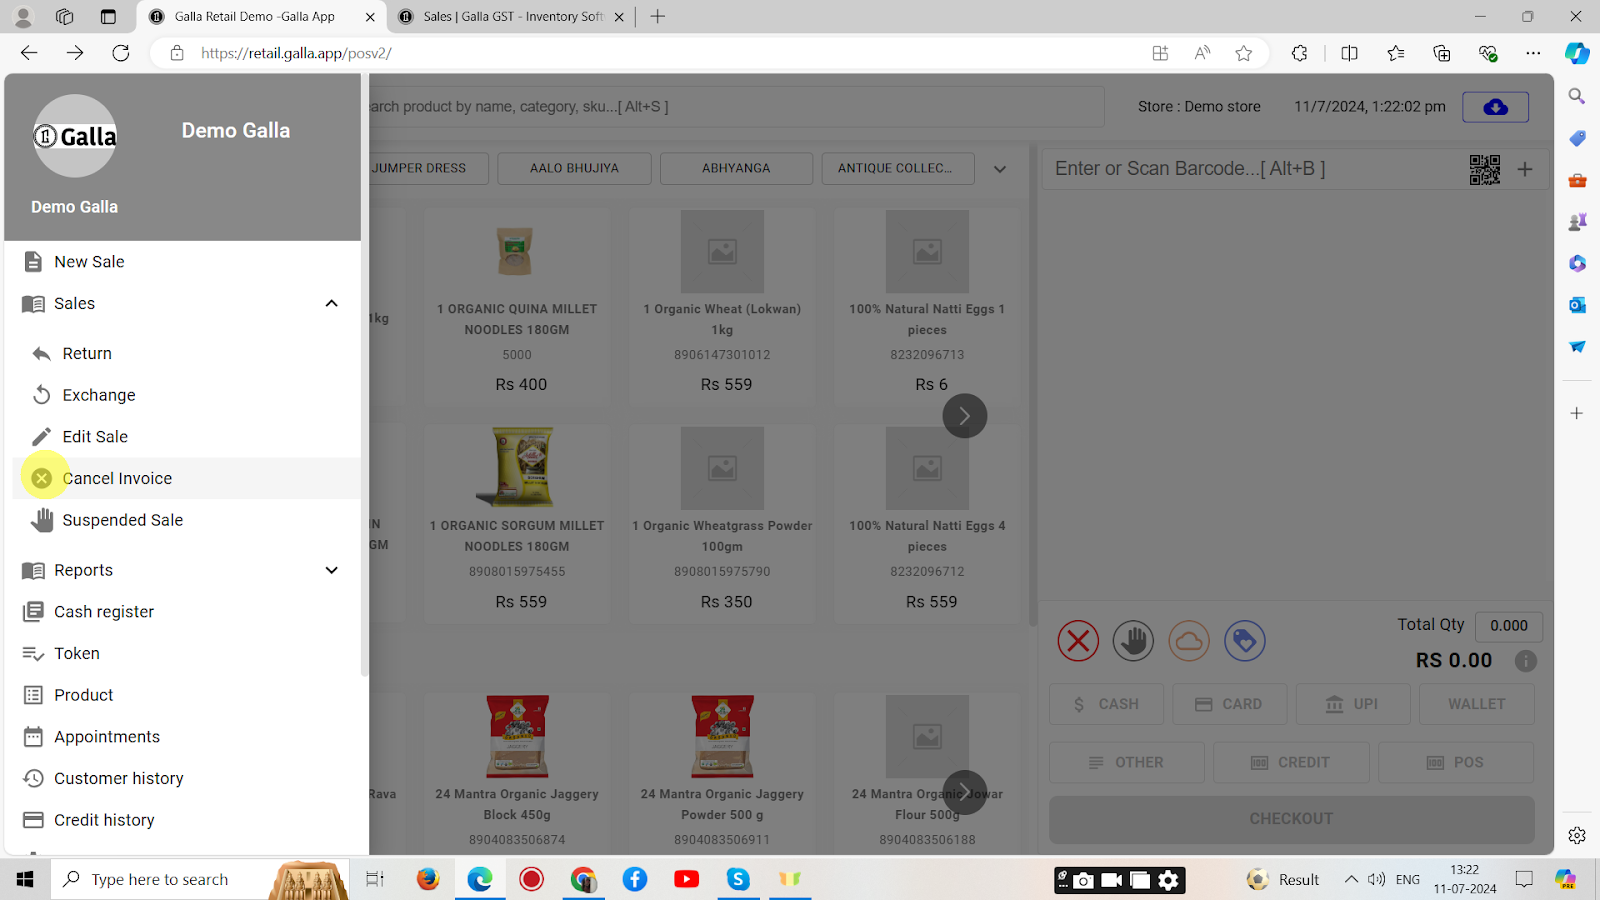
2. Select cancel invoice.
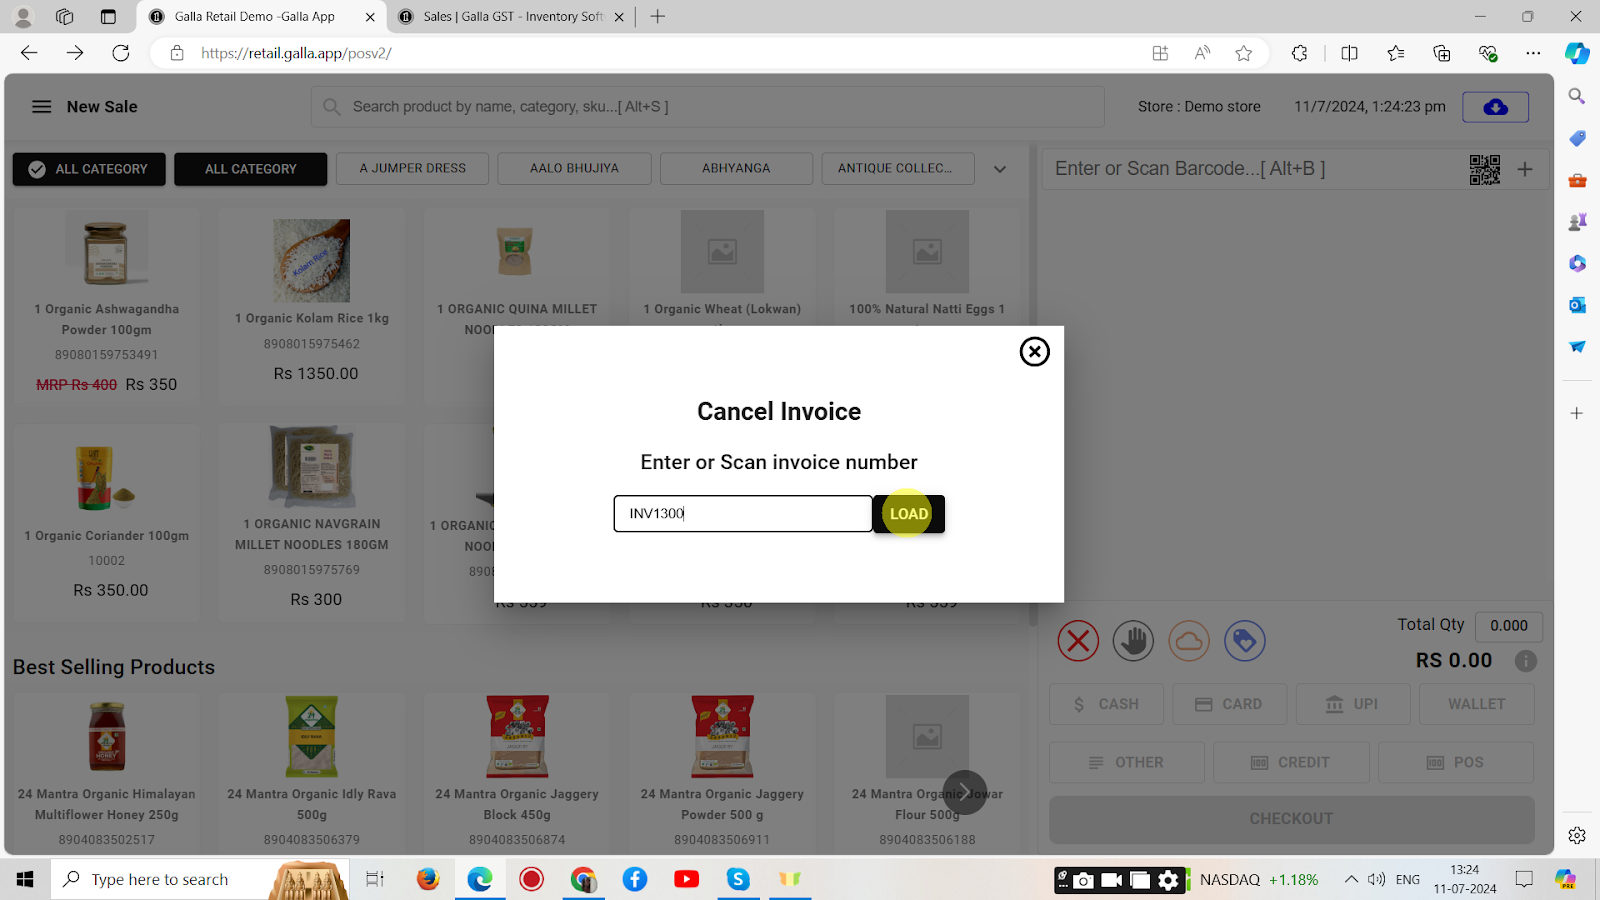
3. Enter the invoice number and click on load as shown below.
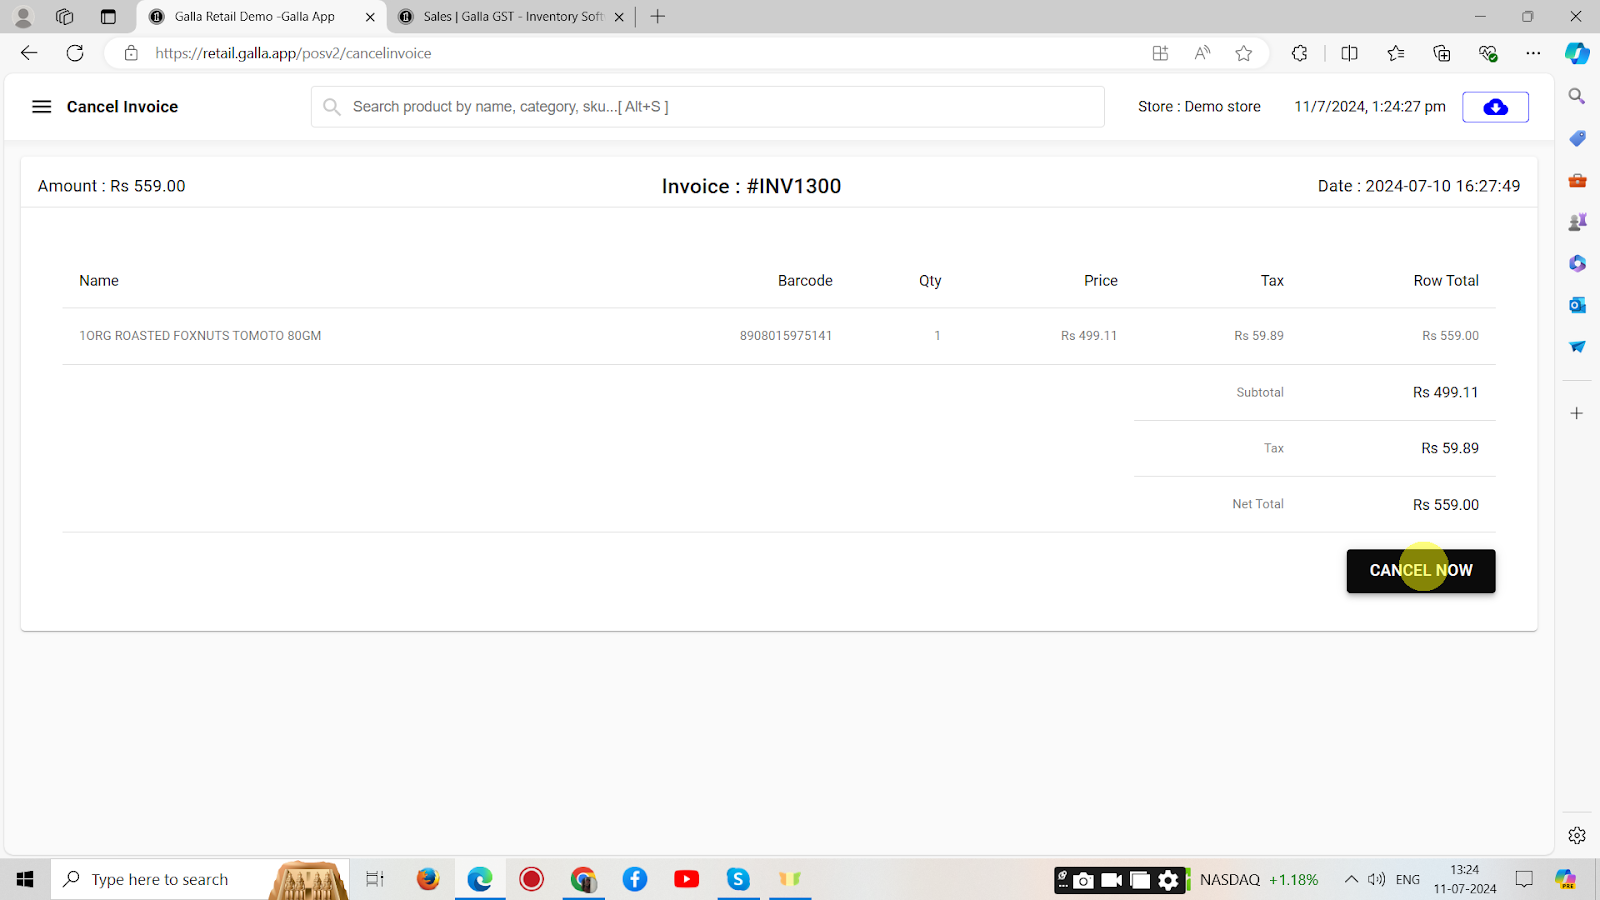
4. The invoice details will appear in shown below. To cancel the invoice, Click on Cancel now.
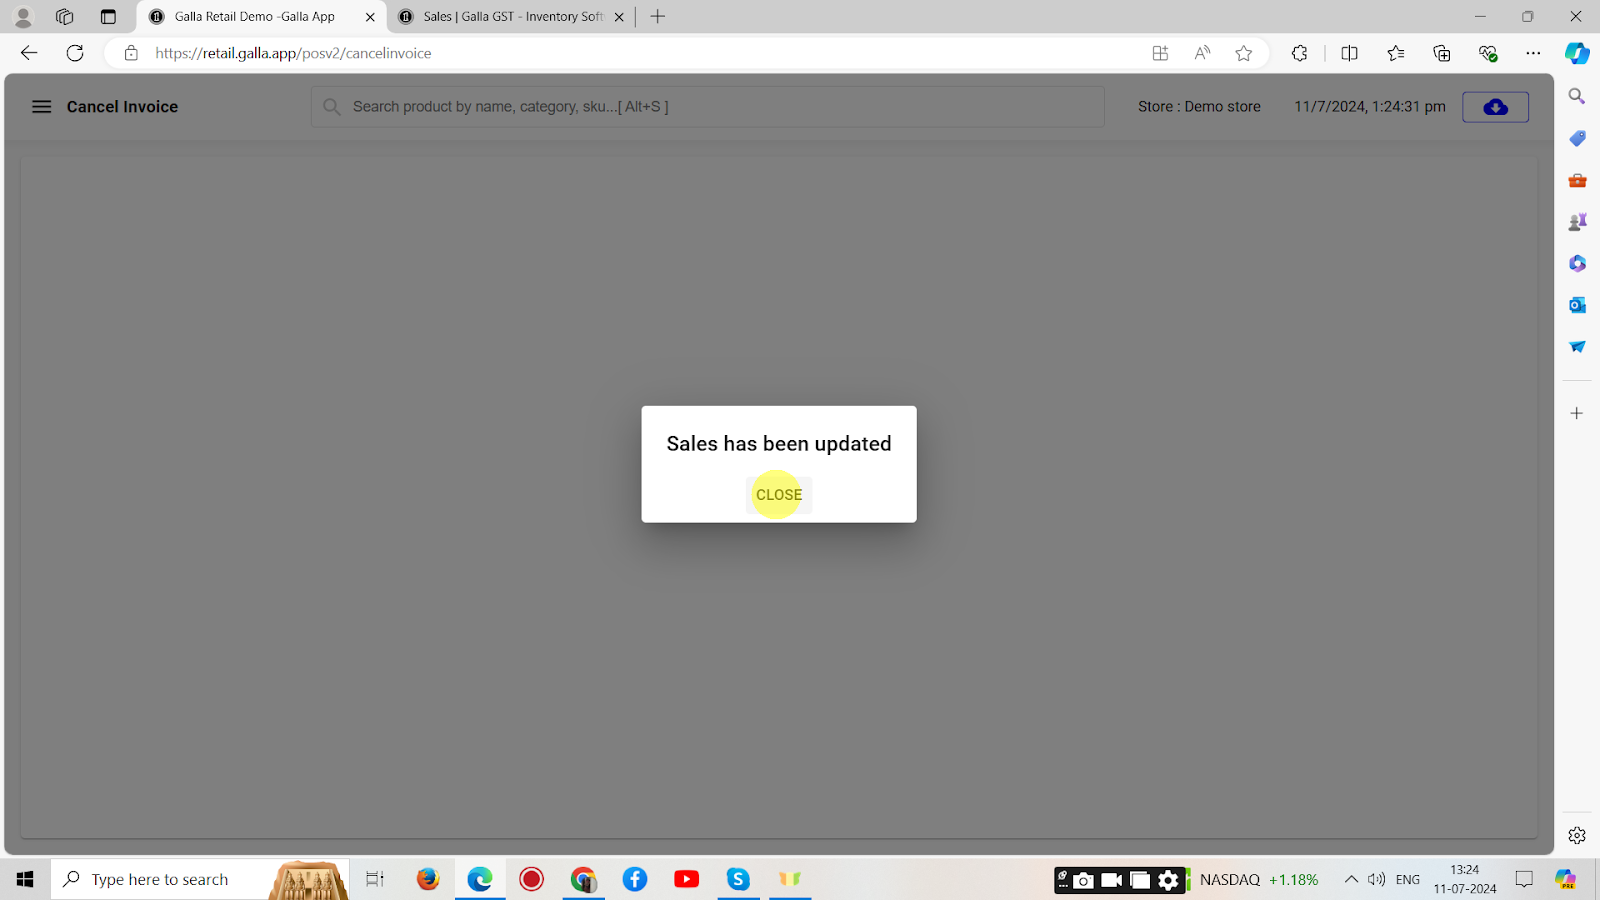
5. Once cancelled, the confirmation page, as shown below will appear.
